If you have a squeaky stair or a chatty patch of floorboards, the noise is annoying, sure. But it is also useful. A squeak is your house telling you two pieces of wood are moving against each other. Your job is not to “lubricate the squeak.” Your job is to remove the movement.
I learned that the hard way early in my contracting days when I tried the classic quick fix, sprinkled powder, enjoyed the silence for about three days, then got humbled by the loudest stair in the county. Let’s skip that part and go straight to the permanent fixes.
What causes the squeak
Squeaks come from friction plus movement. In houses, that usually means one of these situations:
- Subfloor rubbing on a joist because nails loosened over time or the subfloor was never fastened well.
- Two layers rubbing, like hardwood over subfloor, underlayment shifting, or a loose seam.
- Joist movement, where the joist twists slightly and the floor rides along with it.
- Stair parts rubbing, like tread-to-stringer or riser-to-tread joints that have gaps.
Permanent fixes all do the same thing: tighten the joint, fill the gap, or stiffen the framing.
Locate the squeak first
Before you buy anything, take five minutes to pinpoint where the movement is happening. This saves you from fixing the wrong board while the real culprit laughs quietly nearby.
Tools that help
- Painter’s tape and a marker
- Flashlight or headlamp
- Wood shims
- Drill or impact driver
- 2 inch to 2 1/2 inch construction screws (verify your floor thickness)
How to map it
- Get a helper. One person walks, the other listens.
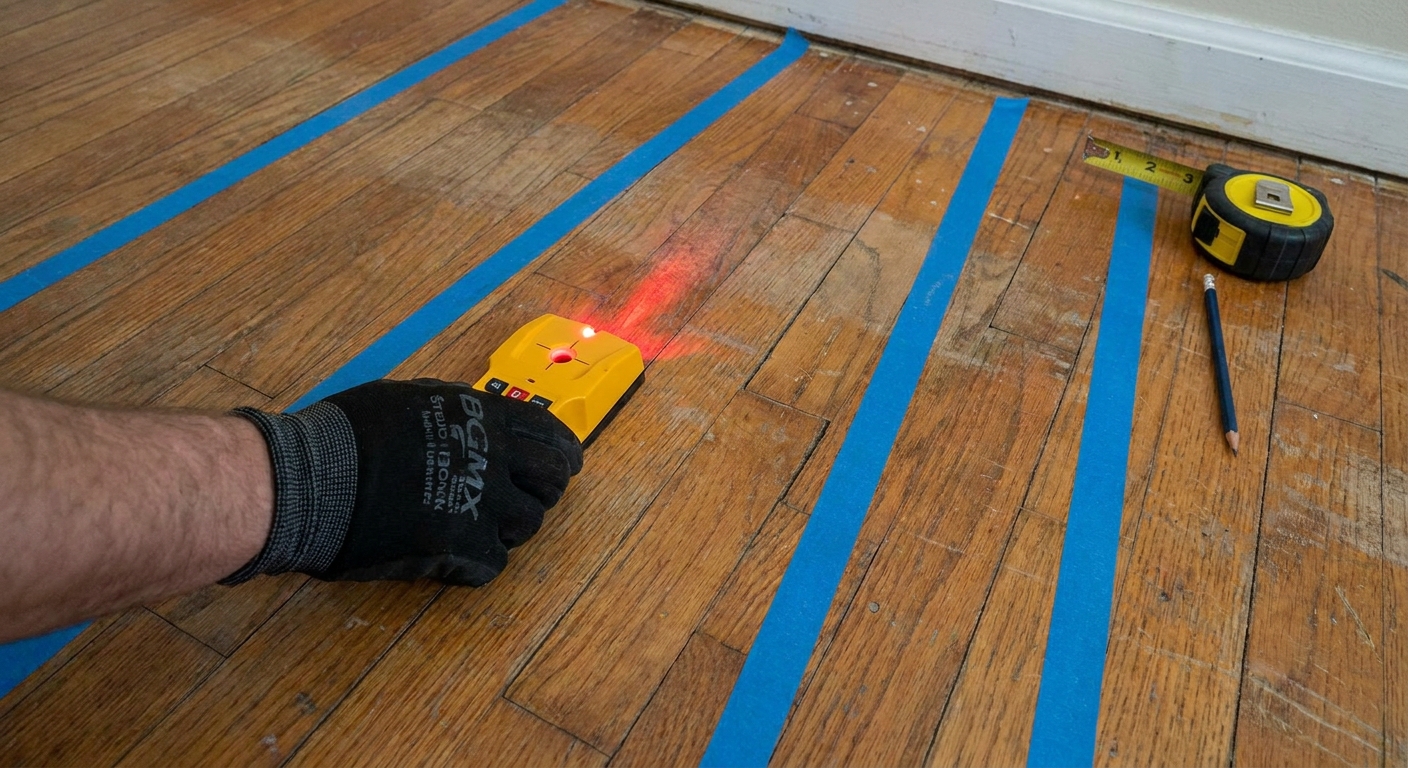
- Mark the exact spot. Put tape on the floor right where the squeak happens.
- Figure out direction. Have your helper shift weight forward, backward, and side-to-side. If the squeak changes, you are chasing movement, not just a noisy surface.
- Find joists. Use a stud finder from above, or measure from a basement or crawlspace where joists are visible. Mark joist lines with tape.
Rule of thumb: If the squeak is near a joist line, it is usually subfloor-to-joist movement. If it is between joists, it is often a loose board, underlayment, or finish flooring issue.
Quick fixes rarely last
You will hear a lot of advice like baby powder, graphite, dry lube, or talc. Those can reduce friction temporarily when the noise is two finished surfaces rubbing. But if the squeak is structural, meaning subfloor and framing are moving, powders just mask symptoms.
If you want a once-and-for-all solution, focus on the fixes below. They are the ones I use when I do not want a callback.
Fix #1: Breakaway screws from above
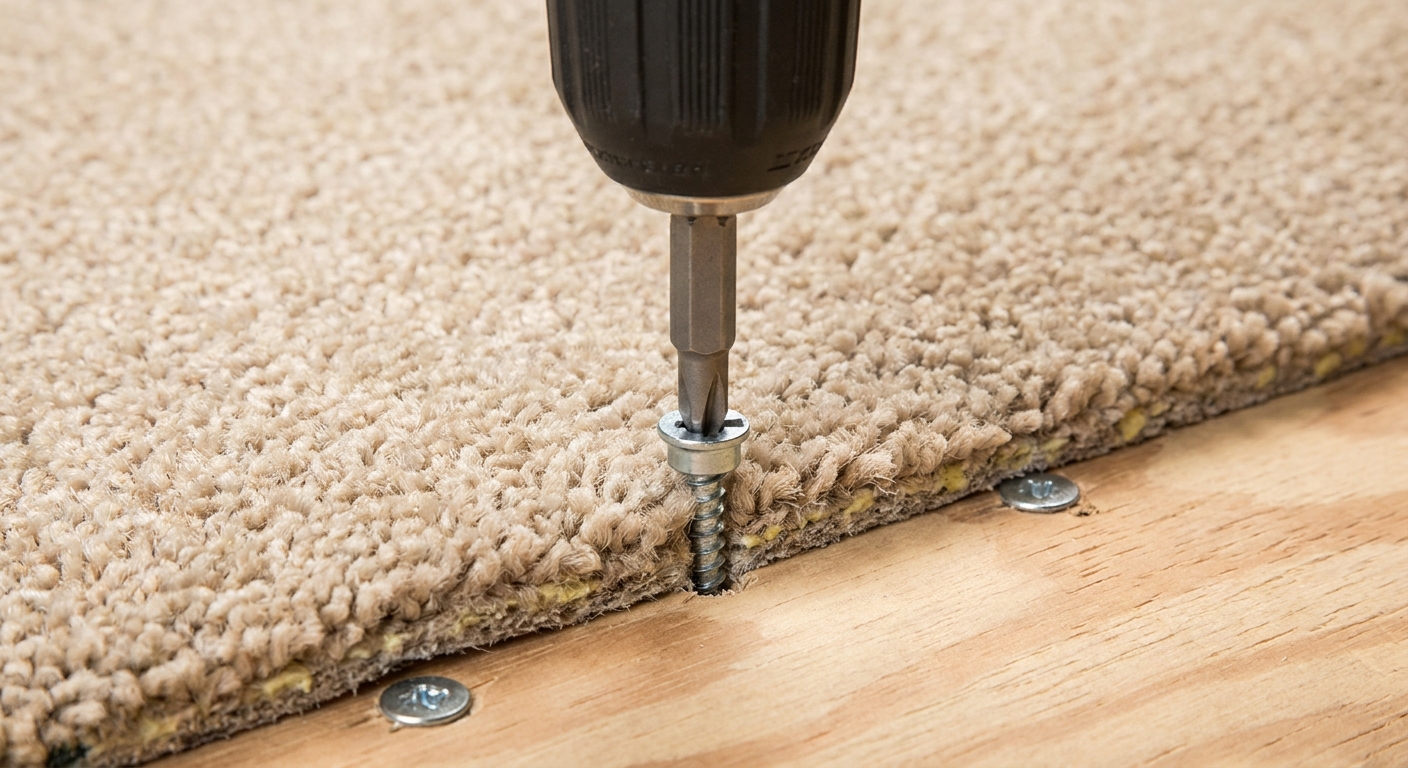
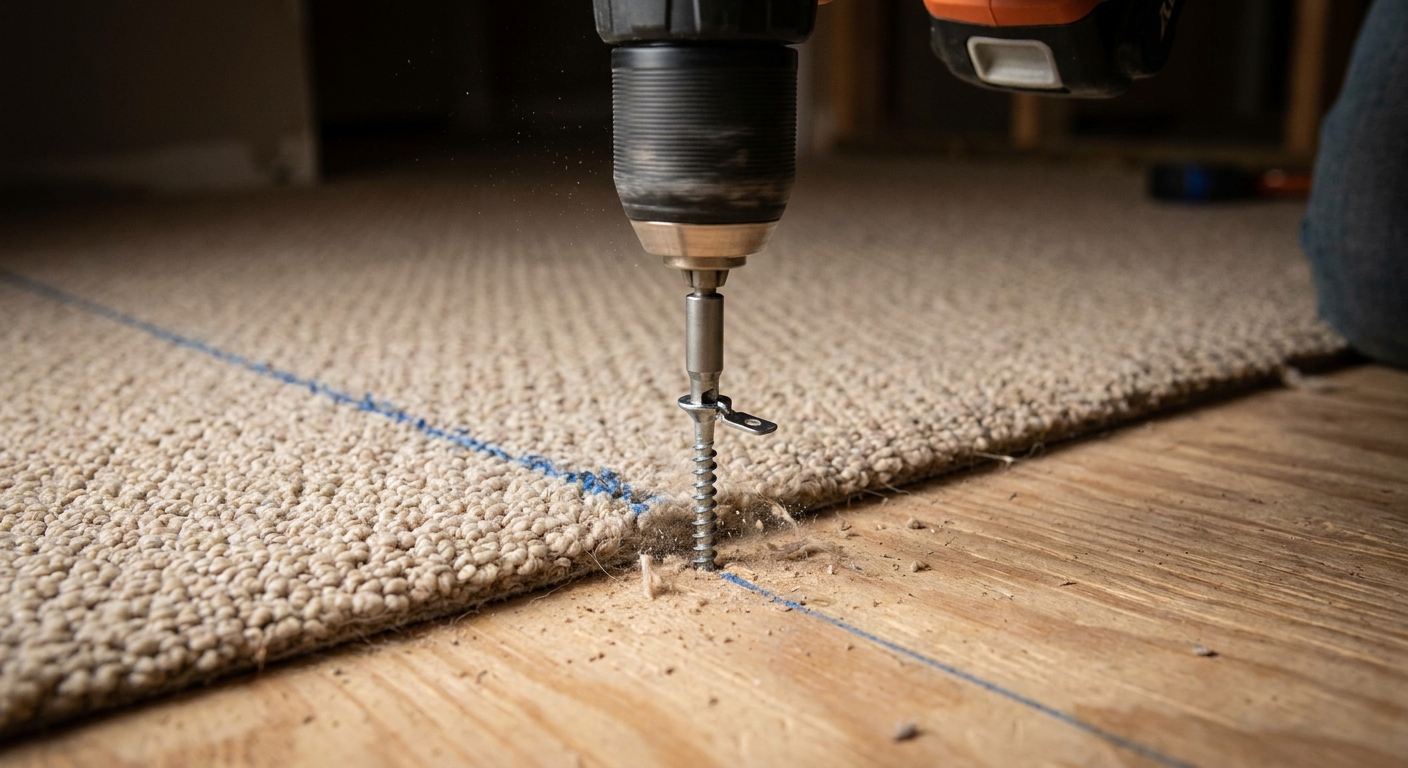
If you have carpet, finished flooring you do not want to pull, or a ceiling below that is finished, a breakaway screw kit is usually the cleanest from-above solution. The goal is to pull the subfloor tight to the joist without leaving a big screw head visible.
Where this works
- Squeaky floors under carpet
- Finished rooms below where you cannot open the ceiling
- Subfloor-to-joist squeaks where you can locate the joist accurately
Two important cautions
- Kits are not universal. Some are intended for carpet or vinyl. On brittle, aged hardwood or some engineered floors, the wrong fastener and the wrong technique can dimple, split, or leave a visible defect.
- Thickness matters. These systems assume a certain floor build-up. If your subfloor is thinner than you think, or you miss the joist, you can create a brand-new squeak.
Step-by-step
- Confirm joist location. This is everything. Miss the joist and you just made a new squeak.
- Set the depth tool that comes with the kit, and follow the manufacturer’s instructions for your floor thickness.
- Drive the special screw straight down through the floor into the joist.
- Snap off the head at the scored breakaway point.
- Test the spot. Walk it immediately. If it is improved but not perfect, add a second screw a couple inches away along the joist line.
Caution from me: I do not use breakaway screws through hardwood unless the kit is designed for that exact application and I am okay with tiny patched holes. For hardwood squeaks, I prefer fixing from below or using trim-head screws with careful countersinking in a spot I can conceal.
Fix #2: Shims from below
If you can get underneath the squeak, like in an unfinished basement or a crawlspace, shimming is one of the most reliable methods. You are filling the gap between subfloor and joist so nothing can move.
What you need
- Wood shims or composite shims
- Construction adhesive (optional but helpful)
- Hammer
- Utility knife
Step-by-step
- Have a helper walk above while you watch the joint from below with a flashlight. Often you can actually see the subfloor flex.
- Find the gap between joist and subfloor, usually right next to a nail or near a seam.
- Add a tiny amount of adhesive on the shim if you want extra insurance.
- Tap the shim in gently. The keyword is gently. You are filling a gap, not jacking up the floor.
- Stop when it is snug. Over-shimming can create a hump or crack plaster upstairs.
- Trim the shim flush so it does not snag anything later.
Extra caution: Do not force shims where there is no visible gap. And if you are working under OSB seams or edges, go even lighter. It is easy to create a ridge that you will feel underfoot later.
Pro tip: If the subfloor is plywood and you have a long seam that squeaks, you may need multiple shims along the same joist. Fix one squeak, then chase the next one. That is normal.
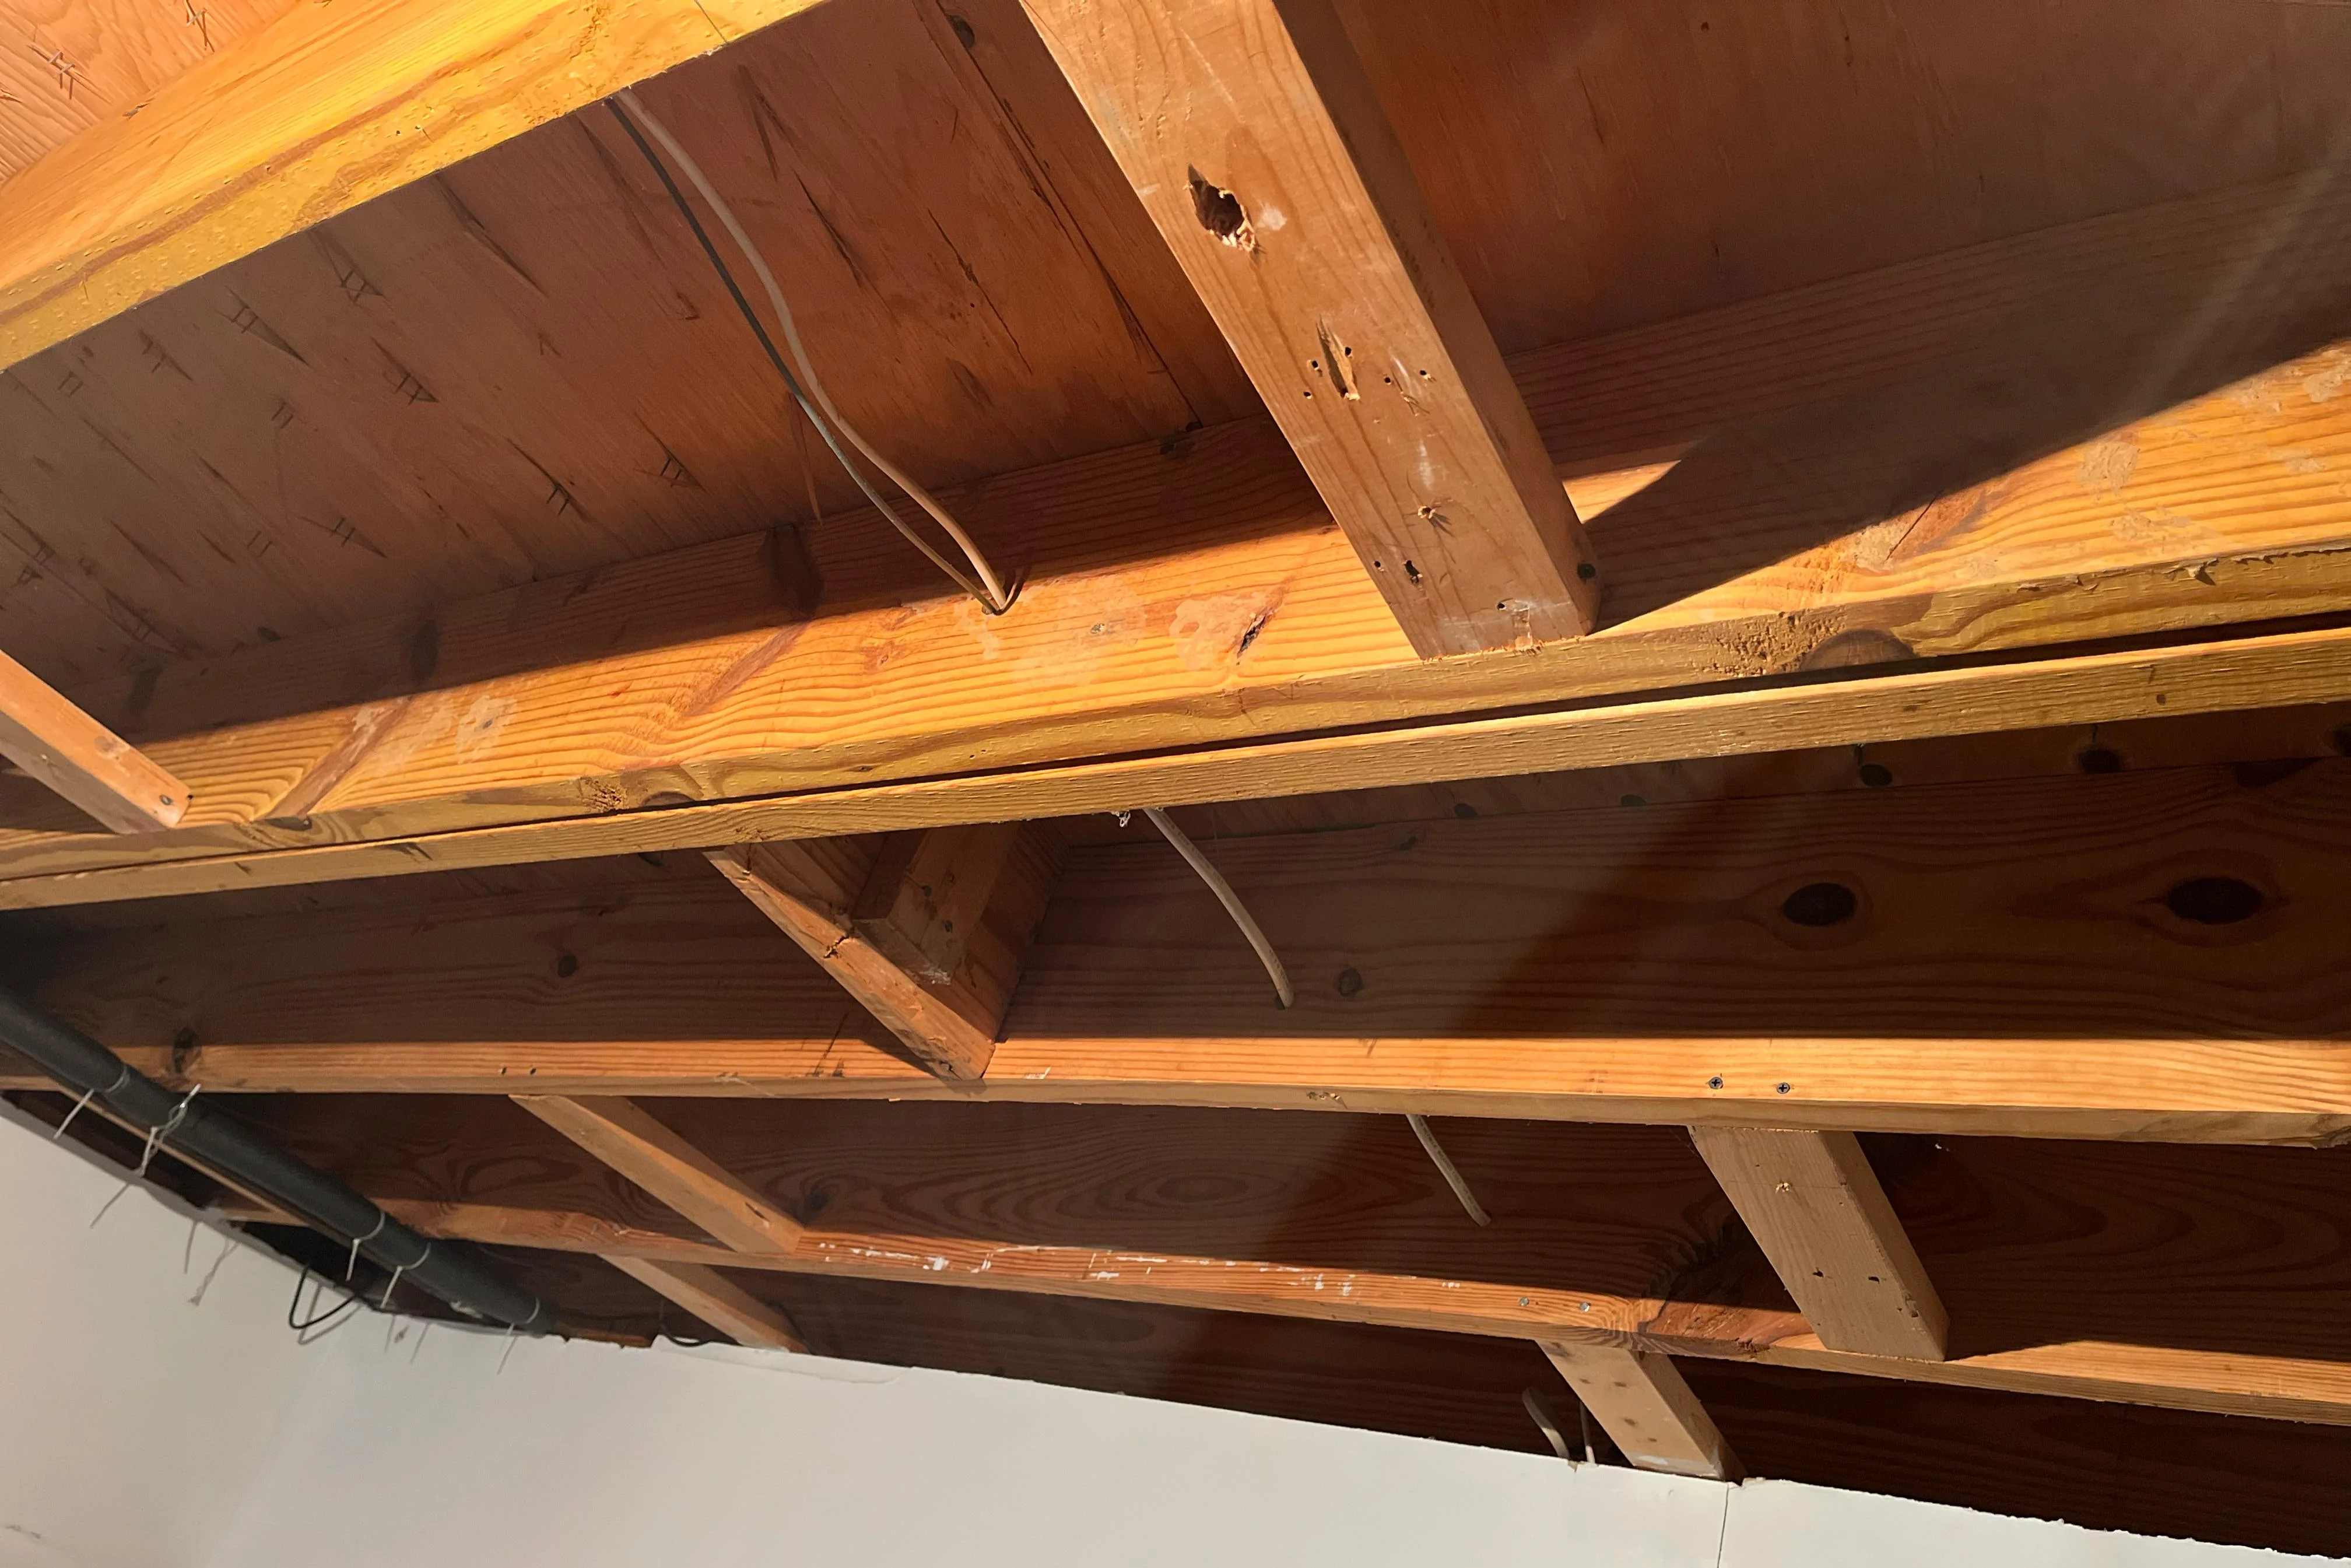
Fix #3: Blocking or bridging
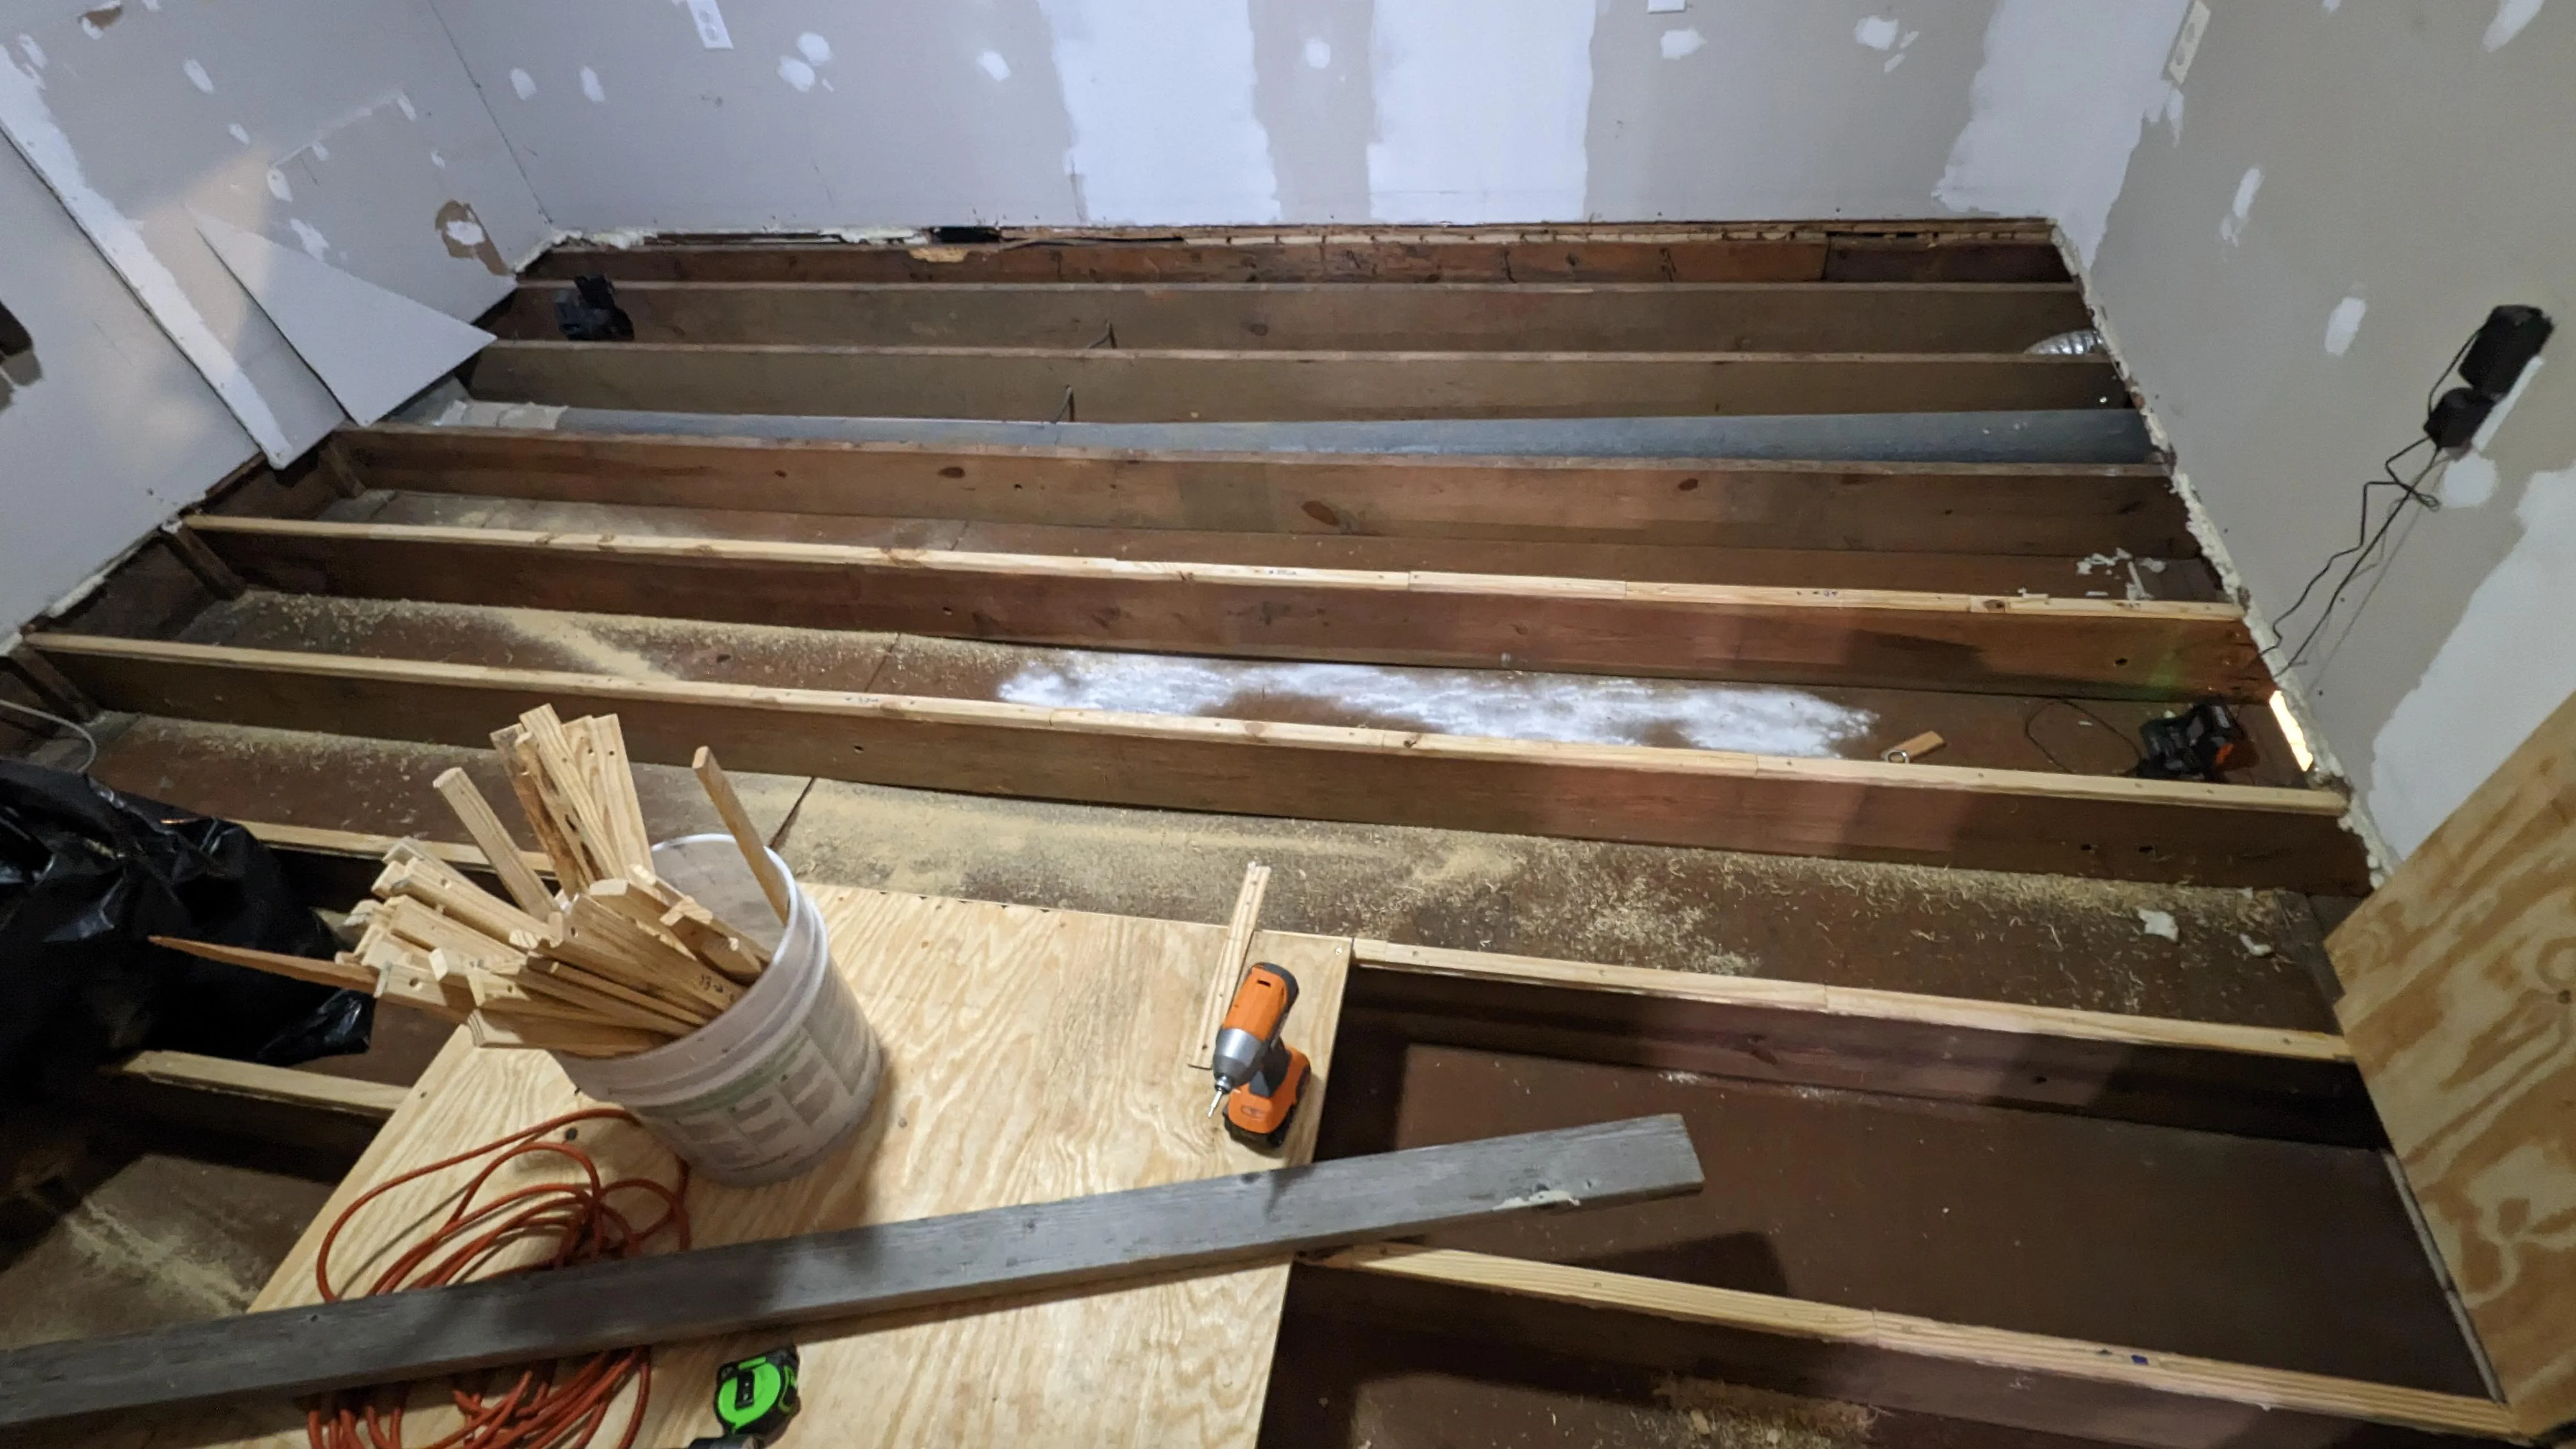
If your squeaky area also feels springy or bouncy, the noise is often coming from joist flex rather than a single loose fastener. That is when blocking or bridging earns its keep by stiffening the floor system and sharing load between joists.
Choose your stiffener
- Solid blocking: Short pieces of dimensional lumber installed between joists. Very strong, very common for targeted fixes.
- X-bridging: Diagonal braces between joists. Common in older homes.
Step-by-step: solid blocking
- Measure the joist bay. Cut blocks to fit snugly between joists.
- Position the block under the squeaky zone, ideally where the subfloor seam sits or where you see movement.
- Apply construction adhesive to the top edge of the block if you can reach the subfloor. This helps eliminate micro-movement.
- Fasten the block with screws or nails through the joists into the block from both sides.
- Re-test from above. You should feel the floor firm up and hear less noise.
Good to know: Blocking and bridging are not squeak-only fixes. They improve feel and can reduce future squeaks by limiting joist twist.
Fix #4: Screw the subfloor right
Sometimes the simplest answer is the right one. If the subfloor was originally nailed, nails can loosen and squeak as they rub in the wood. Screws clamp the layers together and stay put.
Best practices
- Use the right screw length. For many floors, 2 inch to 2 1/2 inch construction or deck screws are in the sweet spot, but do not guess. Verify your subfloor thickness and think about what is under that area (wiring, plumbing, ducts).
- Avoid drywall screws. They are brittle. Use construction, deck, or structural wood screws.
- Do not over-torque. You want tight, not stripped. If you spin out the wood, you lose the clamp force that stops the squeak.
- Screw spacing is a repair guideline. For a localized squeak, I often add screws every 6 to 8 inches along the joist line in the problem zone. That is not a full-floor fastening schedule, just a practical pattern for chasing a specific noise.
From below: driving screws upward
If you have access underneath, you can sometimes drive screws upward through the joist into the subfloor to pull things tight without touching the finished floor above. This is one of those methods that works great when done carefully and goes badly when done casually.
- Choose screw length conservatively. You want bite into the subfloor without risking a point popping through the finished floor, especially under thin hardwood or vinyl.
- Pre-drill. It reduces splitting on older, dry joists and gives you a straighter shot.
- When in doubt, use support instead. A small cleat (like a 1x2 or 2x2) screwed and glued to the side of a joist under a seam can support the subfloor edge and kill movement without relying on an upward screw alone.
Squeaky stairs
Stairs squeak for the same reason floors do, but with more joints packed into a smaller area. The usual culprits are:
- Tread rubbing on the stringer
- Riser rubbing on the tread
- Nails loosening in older stair assemblies
Best case: access from underneath
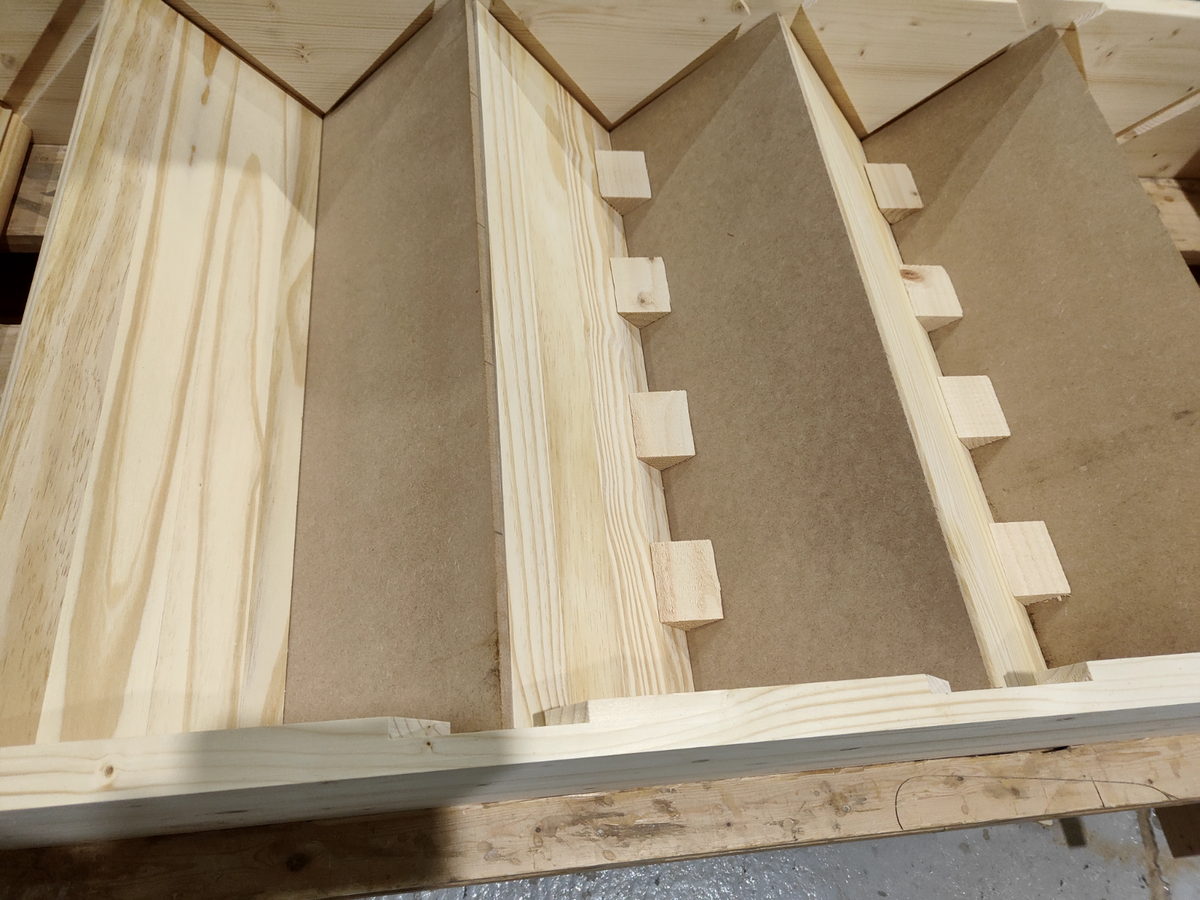
If you can reach the underside of the stairs, you can make a squeaky staircase go quiet in a single session.
- Have a helper step on the squeaky tread. Watch the joints move.
- Add glue blocks. Glue and screw small triangular wood blocks into the inside corner where tread meets riser. This locks the joint.
- Shim gaps. Tap a shim into any visible gap at the stringer joint. Use adhesive, snug it, trim it.
- Add screws where needed. Drive trim-head screws through the stringer into the tread, or through the riser into the tread, depending on where movement is happening.
My go-to combo: glue block plus a shim. The block strengthens the corner. The shim eliminates the gap. Together, they make squeaks disappear.
Special situations
Hardwood squeaks
If the squeak is between hardwood boards, it may be seasonal movement. Tightening the subfloor from below often helps. If the squeak is board-to-board rubbing, a tiny dusting of dry lubricant can help, but I treat it as a last resort.
Engineered or floating floors
If you have a floating floor (common with many click-lock engineered products and laminates), screwing down from above is usually the wrong move because the floor is designed to move as a unit. Squeaks here are often underlayment issues, debris in a joint, or a spot where the subfloor is not flat. In those cases, the durable fix is usually subfloor correction from below, or pulling and re-laying the affected section with the right underlayment.
Tile floors
Squeaks under tile can indicate subfloor movement, which can lead to cracked grout or tile. Tile assemblies should not move. Sometimes blocking helps, but sometimes the real issue is subfloor thickness, underlayment, or an installation that needs a rebuild. If tile is already cracking or the floor feels soft, I lean toward getting a pro involved before you throw fixes at it.
Old plank subfloors
Diagonal plank subfloors love to squeak. A common long-term fix is to add screws through the planks into joists, then add a layer of plywood underlayment when you remodel the finished flooring. For spot squeaks, shims and screws still work, just expect to do a little more of it.
Why it still squeaks
- You missed the joist. Re-map the joist line and try again.
- The squeak moved. You stiffened one point, and the next weakest joint started talking. Keep chasing it along the same joist bay.
- The movement is in the finish layer. Underlayment, floating floors, or hardwood may be rubbing, not the subfloor.
- Over-shimming. If the floor now feels odd or squeaks changed pitch, remove the shim and re-seat it gently.
Safety notes
- Watch for wiring and plumbing before driving screws. Especially near bathrooms and kitchens.
- Use eye protection when working overhead.
- In crawlspaces, wear a respirator if dust, insulation, or droppings are present.
- Do not cut structural members to make room for a block or brace. Work with what you have.
When to call a pro
If you find any of the following while chasing squeaks, it is time to bring in backup:
- Rotten, water-damaged subfloor or joists
- Cracked joists, notched joists, or major sagging
- Tile or plaster cracking that is getting worse
- Signs of termites or carpenter ants
Squeaks are usually just nuisance movement, but occasionally they are the first symptom of a real structural problem.
FAQ
Is WD-40 good for squeaky floors?
Not for structural squeaks. It can stain, attract dust, and it does not stop wood movement. If the noise is subfloor-to-joist, you want screws, shims, blocking, or added support.
Should I use nails or screws?
Screws. Nails can work loose again and start squeaking all over. Use construction or decking screws, not drywall screws.
Do I need to remove carpet?
Not always. Breakaway screw kits are designed for this situation. If the carpet is very plush, compress it firmly so the screw goes in straight.
How long does it take to fix squeaky stairs?
If you have access underneath, many stair squeaks can be solved in 30 to 90 minutes with shims and glue blocks. If access is limited, it can take longer, and you may need to fasten from above and touch up.
The one-and-done mindset
Every permanent squeak repair comes down to one sentence: find the movement and lock it down. Take your time locating the exact joint, choose the fix that matches your access, and resist the temptation to sprinkle and pray. Your future self, walking to the kitchen at midnight without waking the whole house, will be grateful.