If your dryer is tumbling like a champ but your clothes are coming out cold and damp, you are in the right place. The troubleshooting path depends a lot on whether you have a gas dryer (flame heat) or an electric dryer (resistance heat). The good news is that the symptoms overlap, and the most common failure parts are straightforward to test and replace if you work safely and methodically.
I will walk you through what is actually different inside each type of dryer, what to check first, and how to confirm a blown thermal fuse or a bad igniter before you spend money on parts.
Safety first (do this before any testing)
I know, I know. Everyone skips the safety paragraph. But dryers combine heat, electricity, and sometimes gas, which is a pretty exciting trio if you do it wrong.
- Unplug the dryer before removing any panels.
- Gas dryer: close the gas shutoff valve (handle perpendicular to the pipe). If you smell gas at any point, stop and ventilate the area.
- Electric dryer: even unplugged, treat all wiring with respect. When you do live-voltage checks (optional), you must reassemble enough to operate safely and keep hands clear.
- Wear gloves. Sheet metal edges inside dryers are razor-sharp.
- If you have a flexible foil vent duct, plan on replacing it with rigid or semi-rigid metal. Foil traps lint and increases fire risk.
When in doubt, stop and call a pro. Especially if you are uncomfortable working around gas connections or 240 volts.
Gas vs. electric heating: what’s different
Both types of dryers use a blower to move air, thermostats to control temperature, and safety cutoffs to prevent overheating. The big difference is the heat source and the parts that make it happen.
Electric dryer heating parts (typical)
- Heating element (a coil in a metal housing)
- Thermal fuse (safety fuse, usually on blower housing)
- High-limit thermostat (prevents overheating)
- Cycling thermostat or thermistor (controls normal heat cycling)
- Centrifugal switch in the motor (often must be running for heat to energize)
Gas dryer heating parts (typical)
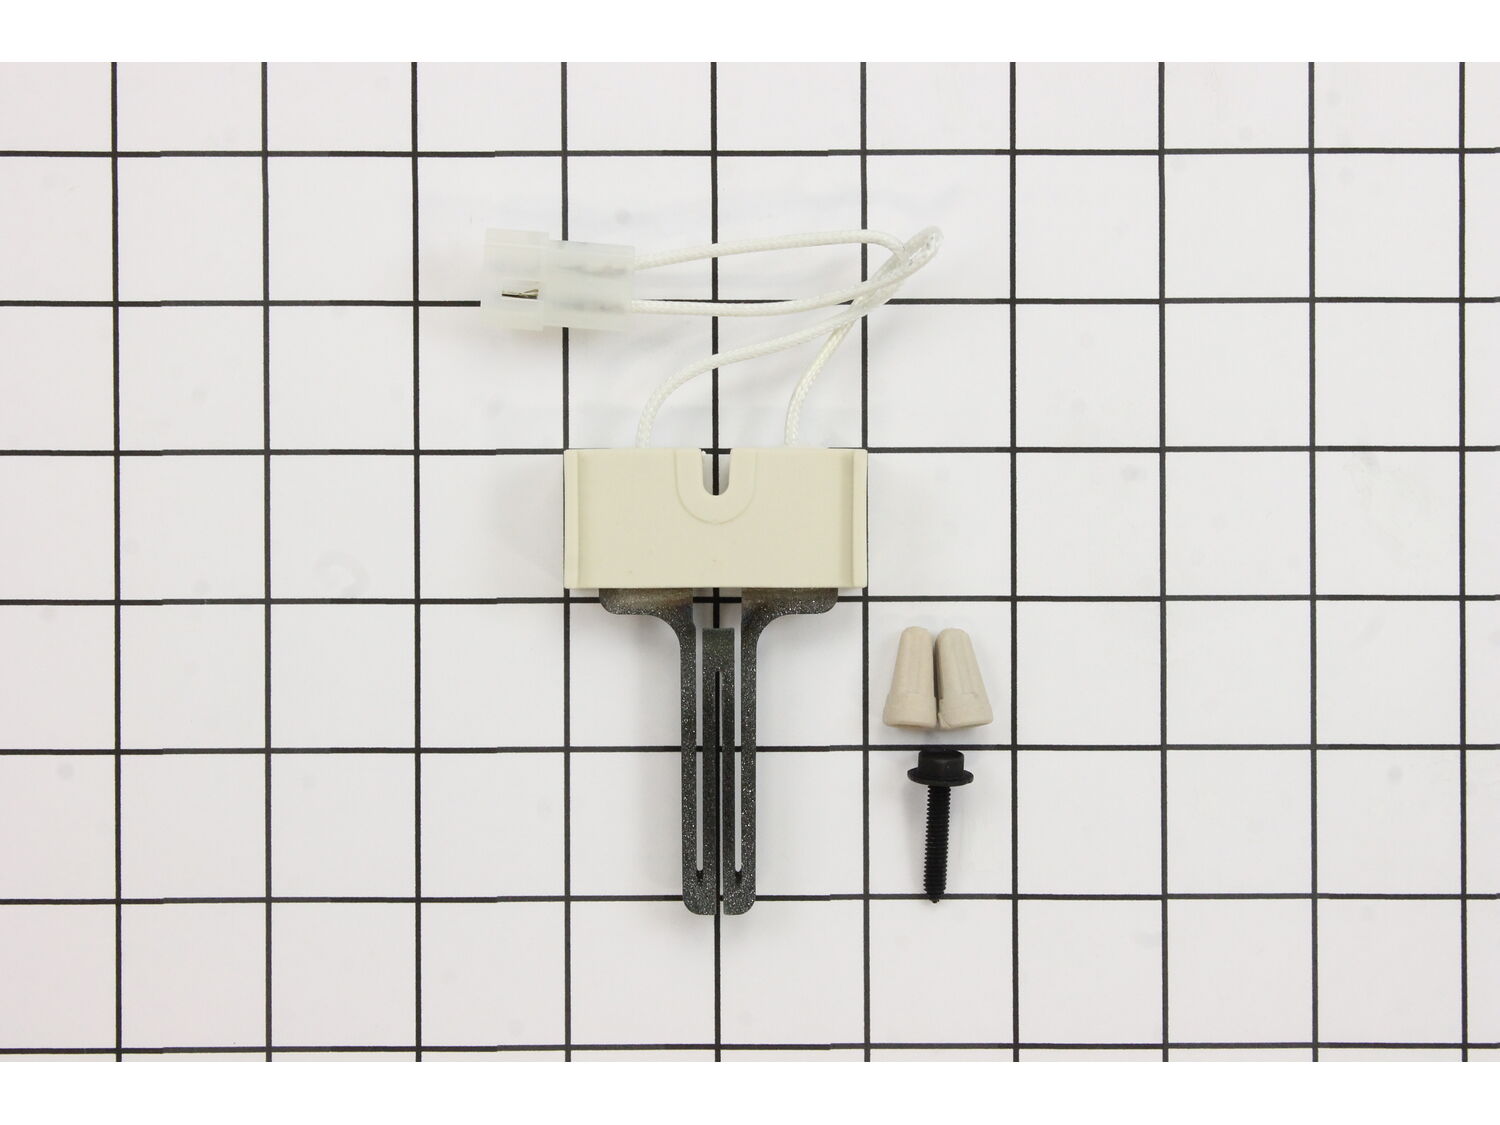
- Igniter (glows hot to light gas)
- Radiant (flame) sensor (helps prove the igniter is hot on many designs)
- Gas valve coils/solenoids (open the gas valve when energized)
- Thermal fuse and high-limit thermostat (same safety job as electric)
- Controls (timer or control board, varies by model)
So if an electric dryer will not heat, you are often chasing a failed element or open fuse/thermostat. If a gas dryer will not heat, the usual suspects are igniter, radiant sensor, and gas coils, plus the same airflow and safety items.
Before you replace anything: confirm airflow
This is the part homeowners hate because it is not a quick swap, but it matters. Poor airflow causes overheating, which blows thermal fuses and trips high-limit thermostats. If you replace the fuse but ignore the clog, you may be doing the job twice.
- Clean the lint screen and the chute it slides into.
- Pull the dryer out and disconnect the vent. Check for lint buildup at the outlet.
- Run the dryer for 30 to 60 seconds with the vent disconnected. You should feel a strong blast of air. Weak airflow points to a clogged blower housing, crushed vent, or lint-packed internal ducting.
- Inspect and clean the entire vent run to the outside hood. Make sure the exterior flap opens freely.
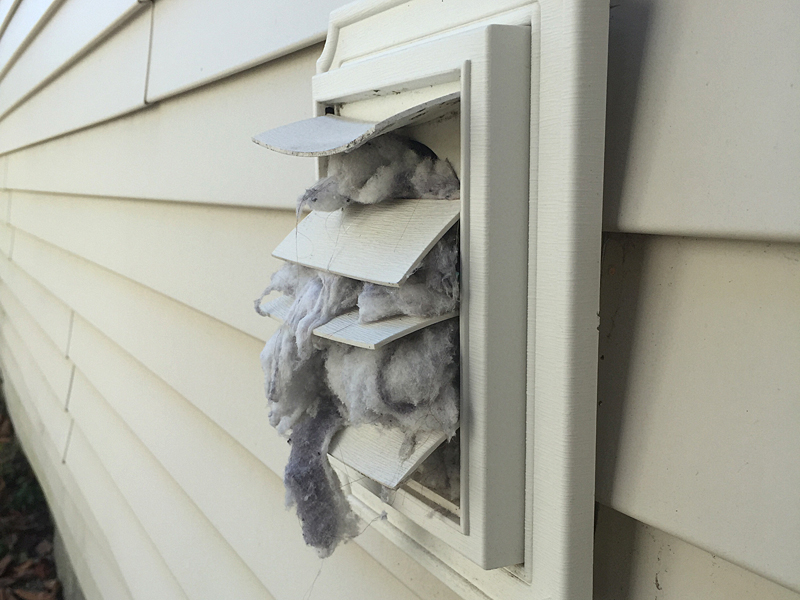
If airflow is poor, fix that first. It is the difference between a one-and-done repair and an expensive repeat.
Fast symptom guide: gas vs. electric no-heat clues
These quick tells help you aim your testing in the right direction.
Electric dryer runs, no heat
- Often a burned-out heating element.
- Could be a blown thermal fuse (especially after a vent clog).
- Could be no 240V supply even though it runs (the motor can run on 120V on many models).
Gas dryer runs, no heat
- If you never see a glow from the burner area, suspect thermal fuse, igniter, or radiant sensor (plus any control or wiring issue that prevents a heat call).
- If it heats once, then stops heating until it cools down, suspect gas valve coils.
- If it ignites but cycles off too quickly, suspect airflow restriction or thermostat issues.
Tools you’ll want
- Phillips and flathead screwdrivers
- Nut drivers (most commonly 1/4 inch and 5/16 inch)
- Needle-nose pliers
- Multimeter with continuity and resistance (ohms) settings
- Shop vacuum and a crevice tool
- Work gloves and a headlamp
A multimeter is the difference between guessing and knowing. Continuity testing is your best friend for thermal fuses, thermostats, and igniters.
Thermal fuse vs. thermal cutoff (quick clarification)
People use these terms interchangeably, and parts listings do not always help.
- Thermal fuse: usually on the blower housing or exhaust path. It is a one-time safety part and is not resettable.
- Thermal cutoff: often mounted on or near the heater housing on electric dryers. It is also typically one-time use. Some manufacturers bundle it with a high-limit thermostat.
Bottom line: if the part is open, replace it with the correct part for your model and fix the airflow issue that caused overheating.
How to diagnose a blown thermal fuse (gas or electric)
The thermal fuse is a one-time safety device. If it opens, the dryer may tumble but not heat, or it may not run at all depending on the design. Either way, you do not reset it. You replace it and fix the underlying overheating cause, usually airflow.
Where it usually is
- Often mounted on the blower housing near the exhaust duct.
- Sometimes on the heater housing (electric) or near the burner duct (gas).
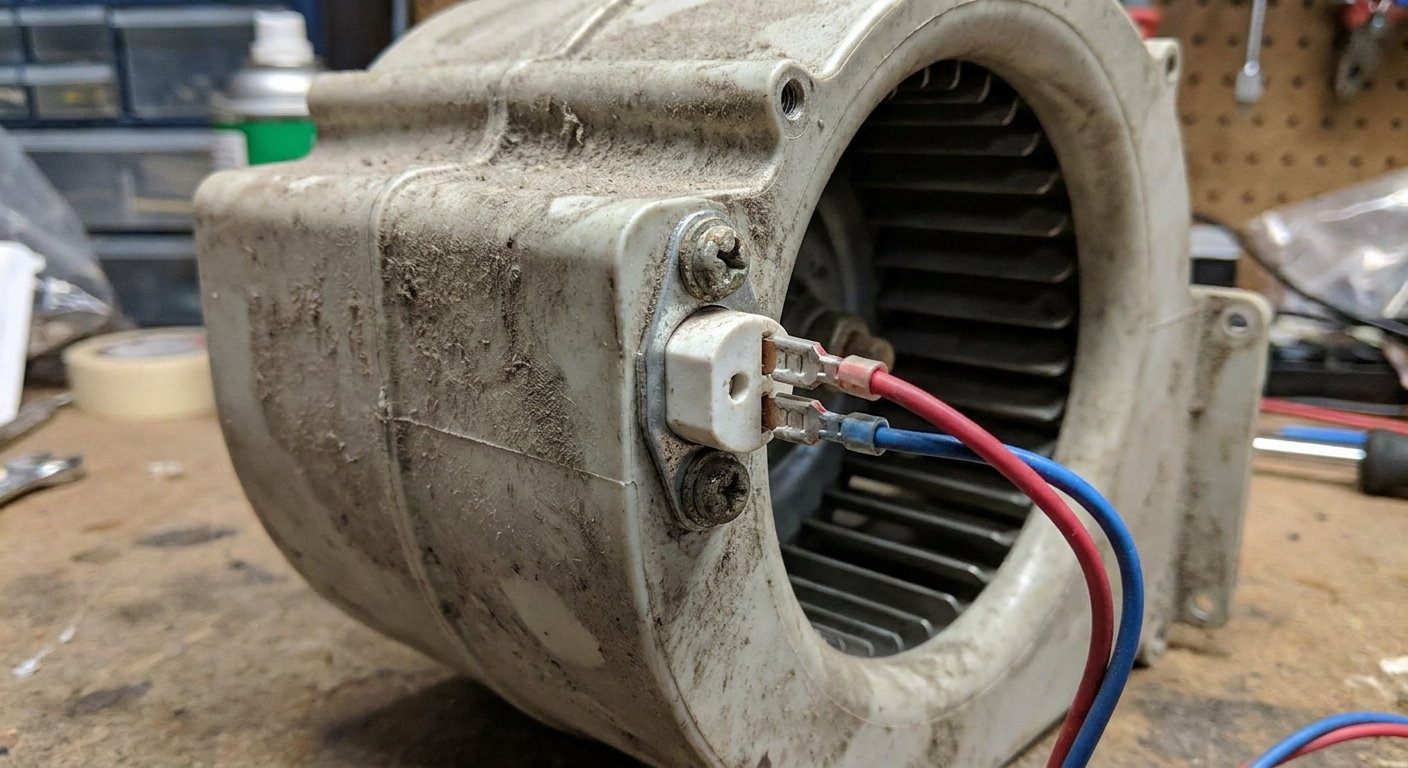
How to test it (simple continuity test)
- Unplug the dryer (and shut gas off if applicable).
- Access the fuse by removing the rear panel or front lower panel, depending on model.
- Take a photo of the wiring so you can put it back correctly.
- Pull the two wires off the fuse terminals.
- Set your multimeter to continuity (or lowest ohms setting).
- Touch a probe to each terminal. A good fuse reads 0 to 1 ohm or beeps for continuity. A bad fuse reads OL or very high resistance.
Important: Do not bypass a thermal fuse “just to see if it works.” I have seen that shortcut turn into a melted vent hose and a scorched laundry room wall. The fuse is there for a reason.
Replacement notes
- Replace with the exact part number for your model.
- Many manufacturers recommend replacing the thermal fuse and its paired thermostat together if sold as a kit.
- After replacement, re-check airflow and clean lint. Otherwise, it can blow again.
Electric dryer not heating: the tests that matter
1) Confirm you have full power (240V supply)
An electric dryer can sometimes run with only one “leg” of power. That means the drum turns, but the heater never gets the 240 volts it needs.
- Check the breaker. Many dryers use a double-pole breaker. One side can trip while the other looks fine.
- If you are comfortable using a multimeter, test the outlet. On a typical 4-prong dryer outlet, you should see roughly 240V across the two hot slots. You should also see roughly 120V from each hot to neutral. Ground testing is separate and outlet styles vary, so if any of this feels unfamiliar, stop here and call an electrician.
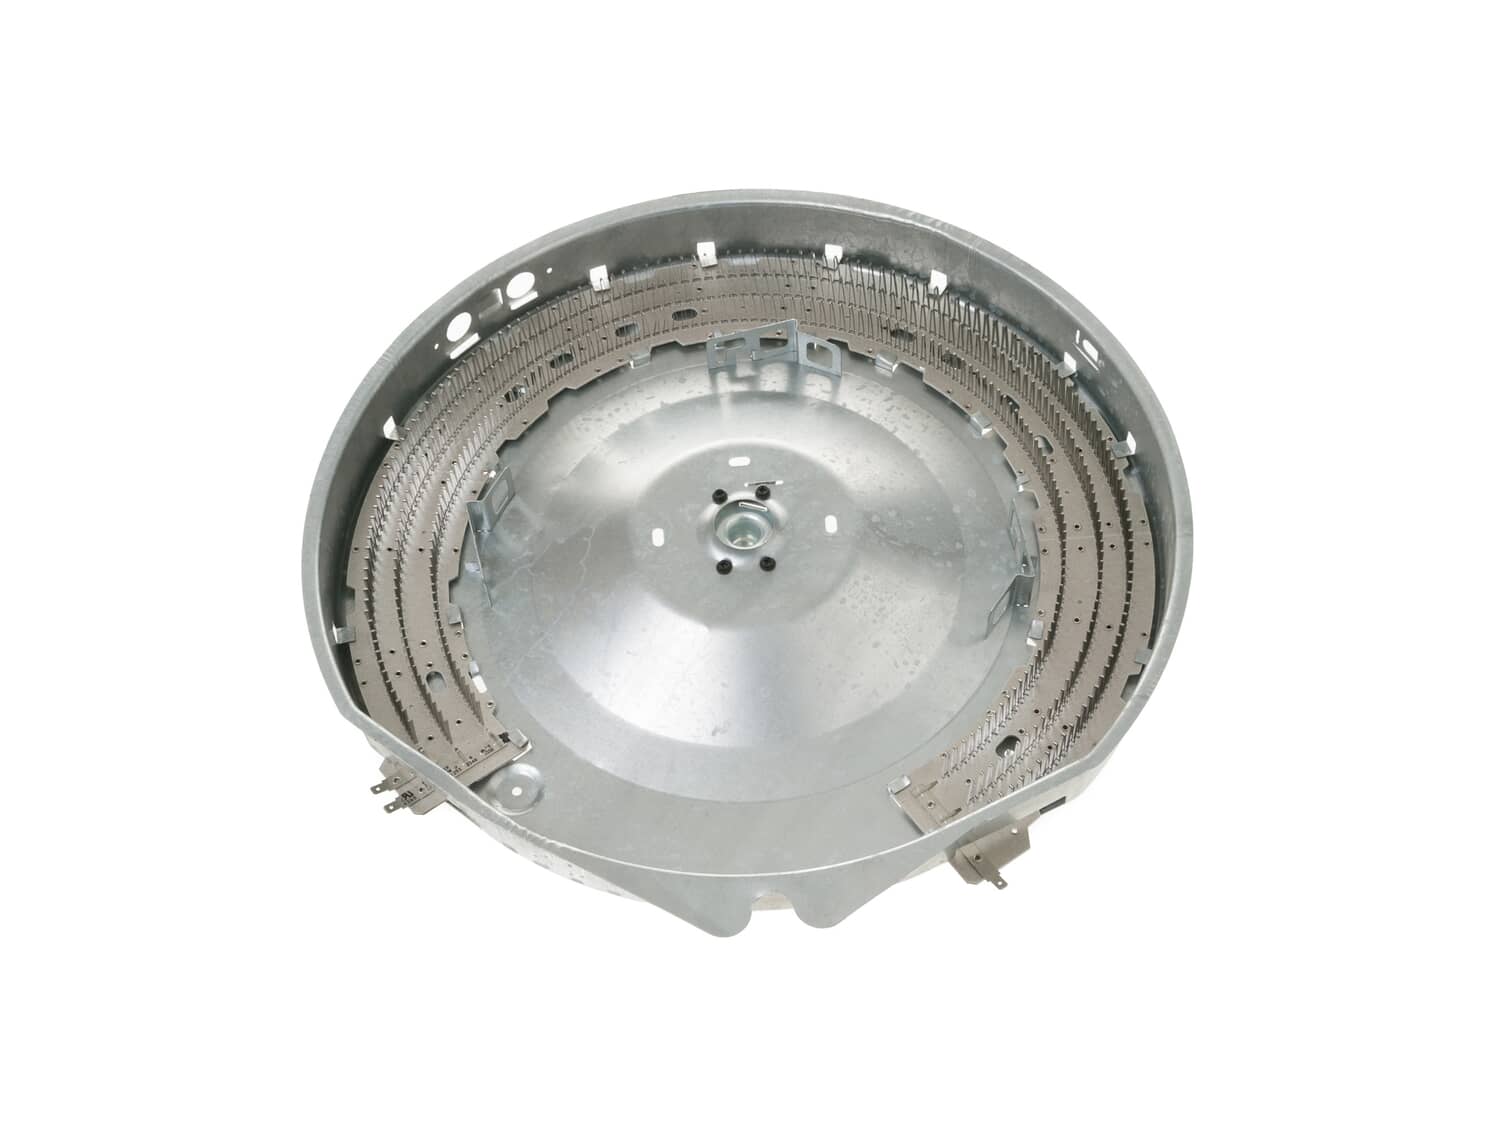
2) Test the heating element
The element is essentially a big coil. If it breaks, there is no heat.
- Unplug the dryer.
- Access the heater housing (often from the rear).
- Disconnect wires from the element terminals.
- Measure resistance across the element terminals. Many elements read in the general range of 8 to 15 ohms, but it is model-dependent. If you read OL, the element is open and needs replacement.
- Also check for a short to ground by placing one probe on an element terminal and the other on the metal housing. You should read OL. Any measurable resistance can indicate a grounded element.
3) Test the high-limit thermostat and thermal cutoff
These safety devices can open if the dryer overheats. Test them the same way as the thermal fuse: remove at least one wire and check continuity. If one is open, replace it and address airflow.
4) If everything tests good
At that point, you may be looking at a control issue (timer contacts, heater relay on a control board), a wiring problem, or a motor centrifugal switch issue. Those are real, but less common than element or fuse failures. If your model has a tech sheet or wiring diagram inside the console or toe-kick area, it can help you confirm which parts are in the heat circuit.
Gas dryer not heating: igniter vs. coils vs. sensor
Gas dryers are pretty logical once you know the basic sequence. Exact wiring varies by model, but on many common designs it looks like this:
- Dryer calls for heat.
- Igniter energizes and glows.
- The radiant (flame) sensor detects heat from the igniter and switches the circuit, which allows the gas valve coils to energize.
- Gas valve opens and the burner lights.
In other words, that sensor is usually proving the igniter is hot, not “confirming flame” the way some modern gas appliances do. If the sequence breaks anywhere, you get no heat.
1) Look through the inspection port for ignition
Many gas dryers have a small peep hole near the burner area. Start the dryer on a heat cycle and watch (from a safe position).
- No glow at all: suspect blown thermal fuse, failed igniter, a switch issue, or the control not calling for heat.
- Glow but no flame: suspect the radiant sensor, gas supply off, or gas valve coils.
- Flame lights once then quits later: classic gas valve coil symptom.
2) Test the igniter
Igniters are brittle. Best practice is to handle the ceramic base, avoid bumping the carbide, and keep fingerprints and oils off the heating surface when you can.
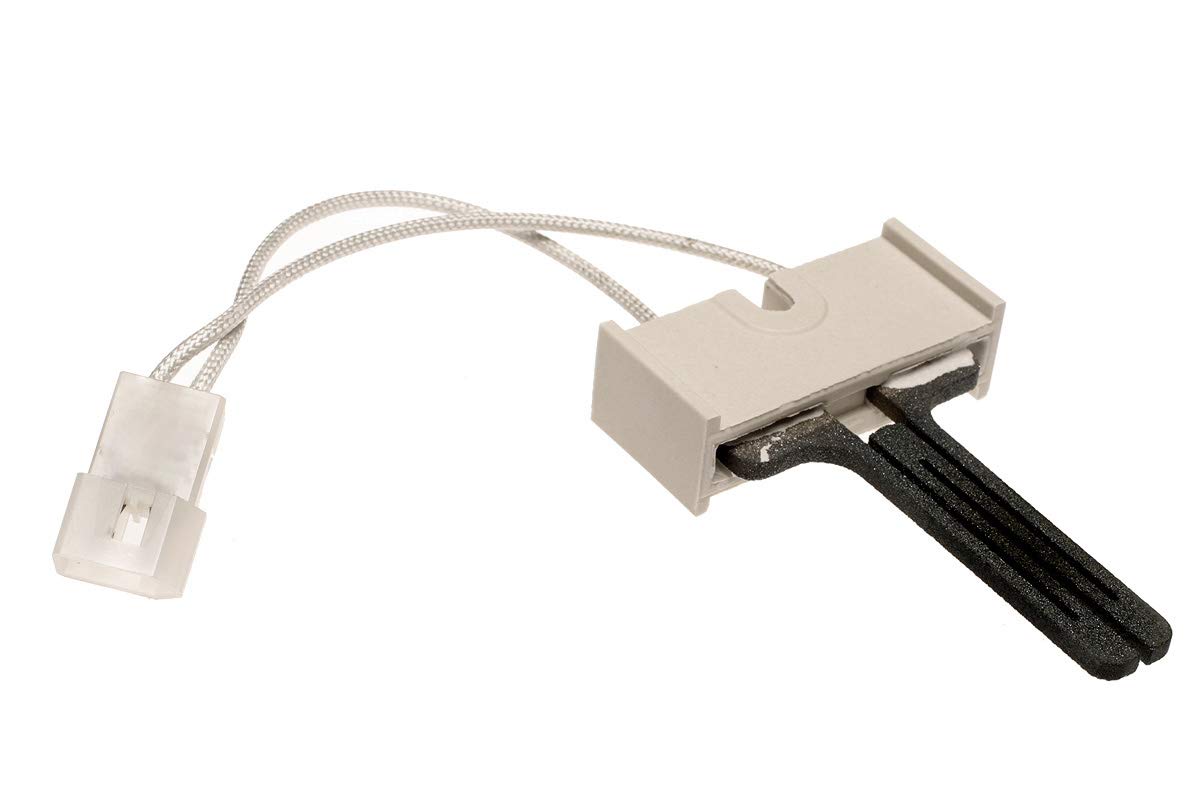
- Unplug the dryer and shut off gas.
- Access the burner assembly (front or lower access panel on many models).
- Disconnect the igniter plug or remove at least one wire.
- Measure resistance through the igniter. Many read roughly 50 to 400 ohms, but it is model-dependent. If you read OL, it is open and needs replacement.
If the igniter reads okay but never glows, the issue may be upstream (thermal fuse, thermostat, control, wiring).
3) Test the radiant (flame) sensor
The radiant sensor is typically mounted on the side of the burner tube. Typically, many common radiant sensors show continuity at room temperature and open when heated by the igniter, but designs vary. If your dryer has a tech sheet, follow its checks for your exact model.
- With power off, remove a wire and test continuity at room temp. If it is open at room temp on a design that should be closed, it is likely bad.
4) Gas valve coils: the “heats once” giveaway
If your dryer ignites normally at the start, then later you find it running with no heat, and it might relight only after it cools, the coils are prime suspects. They can weaken when hot and fail to open the valve.
- Coils are usually replaced as a set.
- They are inexpensive compared to service calls.
- Testing coils with a meter can be inconclusive. The most reliable check is symptom-based, combined with watching for a normal igniter glow but no ignition once the problem starts.
Replacement basics (what’s different between gas and electric)
Thermal fuse replacement (both)
- Remove mounting screws, swap fuse, reconnect wires firmly.
- Vacuum lint in the blower housing area while you are there.
- Do not mix up connectors if there are multiple small parts mounted together. Take a clear photo first.
Electric heating element replacement
- Most elements come as a coil mounted in a housing or as a coil-only kit.
- If your model uses a coil-only repair, make sure the coil is positioned correctly and not touching the housing, or it can short and fail early.
- Inspect wiring for heat damage at terminals. Replace burnt connectors.
Gas igniter replacement
- Handle gently. Tighten screws snug, not gorilla-tight.
- Route wires away from the burner area and moving parts.
- After reassembly, turn gas back on and do a quick leak check at any disturbed connection using a soapy water solution. Bubbles mean a leak. If you see bubbles, shut gas off and correct the connection.
If you had to disconnect the gas line to access parts, and you are not 100 percent confident putting it back, that is a good moment to bring in a pro.
Common mistakes that waste time (and money)
- Replacing the thermal fuse without cleaning the vent. The fuse is the messenger. Do not shoot the messenger and ignore the fire hazard.
- Assuming “it runs” means the electric dryer has proper power. A half-tripped breaker is sneaky.
- Testing parts without removing at least one wire. You can get false readings through the circuit.
- Handling a gas igniter like it is a regular light bulb. They are fragile, and careful handling helps avoid early failure.
- Skipping photos. A 5-second picture saves a 30-minute head scratch.
When to stop DIY and call a pro
- You smell gas and cannot immediately identify a simple, safe reason (like a valve left open).
- The dryer needs live-voltage testing and you are not experienced with a multimeter.
- Any wiring looks melted, charred, or the harness is damaged deep inside the machine.
- You have corrected airflow and replaced common parts, but the dryer still will not heat. Control board diagnostics can get model-specific fast.
Quick FAQ
Can a dryer blow a thermal fuse and still run?
Yes. On many models, the thermal fuse only kills the heat circuit, not the motor circuit. Some designs stop the dryer entirely. Either way, the fuse must be replaced, not reset.
My gas dryer igniter glows but there’s no flame. What’s most likely?
If the gas supply is on and other gas appliances work, suspect the radiant sensor or gas valve coils. If it glows continuously and never lights, the coils are a common cause. If it glows briefly then shuts off without flame, the sensor is high on the list.
My electric dryer has no heat but the element tests good. Now what?
Check the thermal fuse and high-limit thermostat for continuity, then confirm proper 240V supply. If those check out, the issue may be control-related (timer contacts, heater relay) or a wiring problem.
What usually causes repeat thermal fuse failures?
Restricted airflow. Long vent runs, crushed ducts, clogged exterior hoods, lint buildup inside the dryer, and using flimsy foil ducting are the big ones.
The simple takeaway
Electric dryer no-heat is most often power supply, thermal fuse, thermostat, or heating element. Gas dryer no-heat is often thermal fuse, igniter, radiant sensor, or gas valve coils. In both cases, strong airflow is the foundation. Fix that first, test with a meter, and you will replace parts because they are proven bad, not because you are hoping for a lucky guess.