A refrigerator that suddenly stops cooling can feel like an emergency. It is definitely urgent for food safety, but you usually have time to make a few smart checks before you panic-buy coolers and ice. Most “warm fridge” problems come down to airflow, dirty coils, a fan that quit, or a simple control setting. We’ll walk through the checks in the order that saves the most time and avoids unnecessary part swapping.
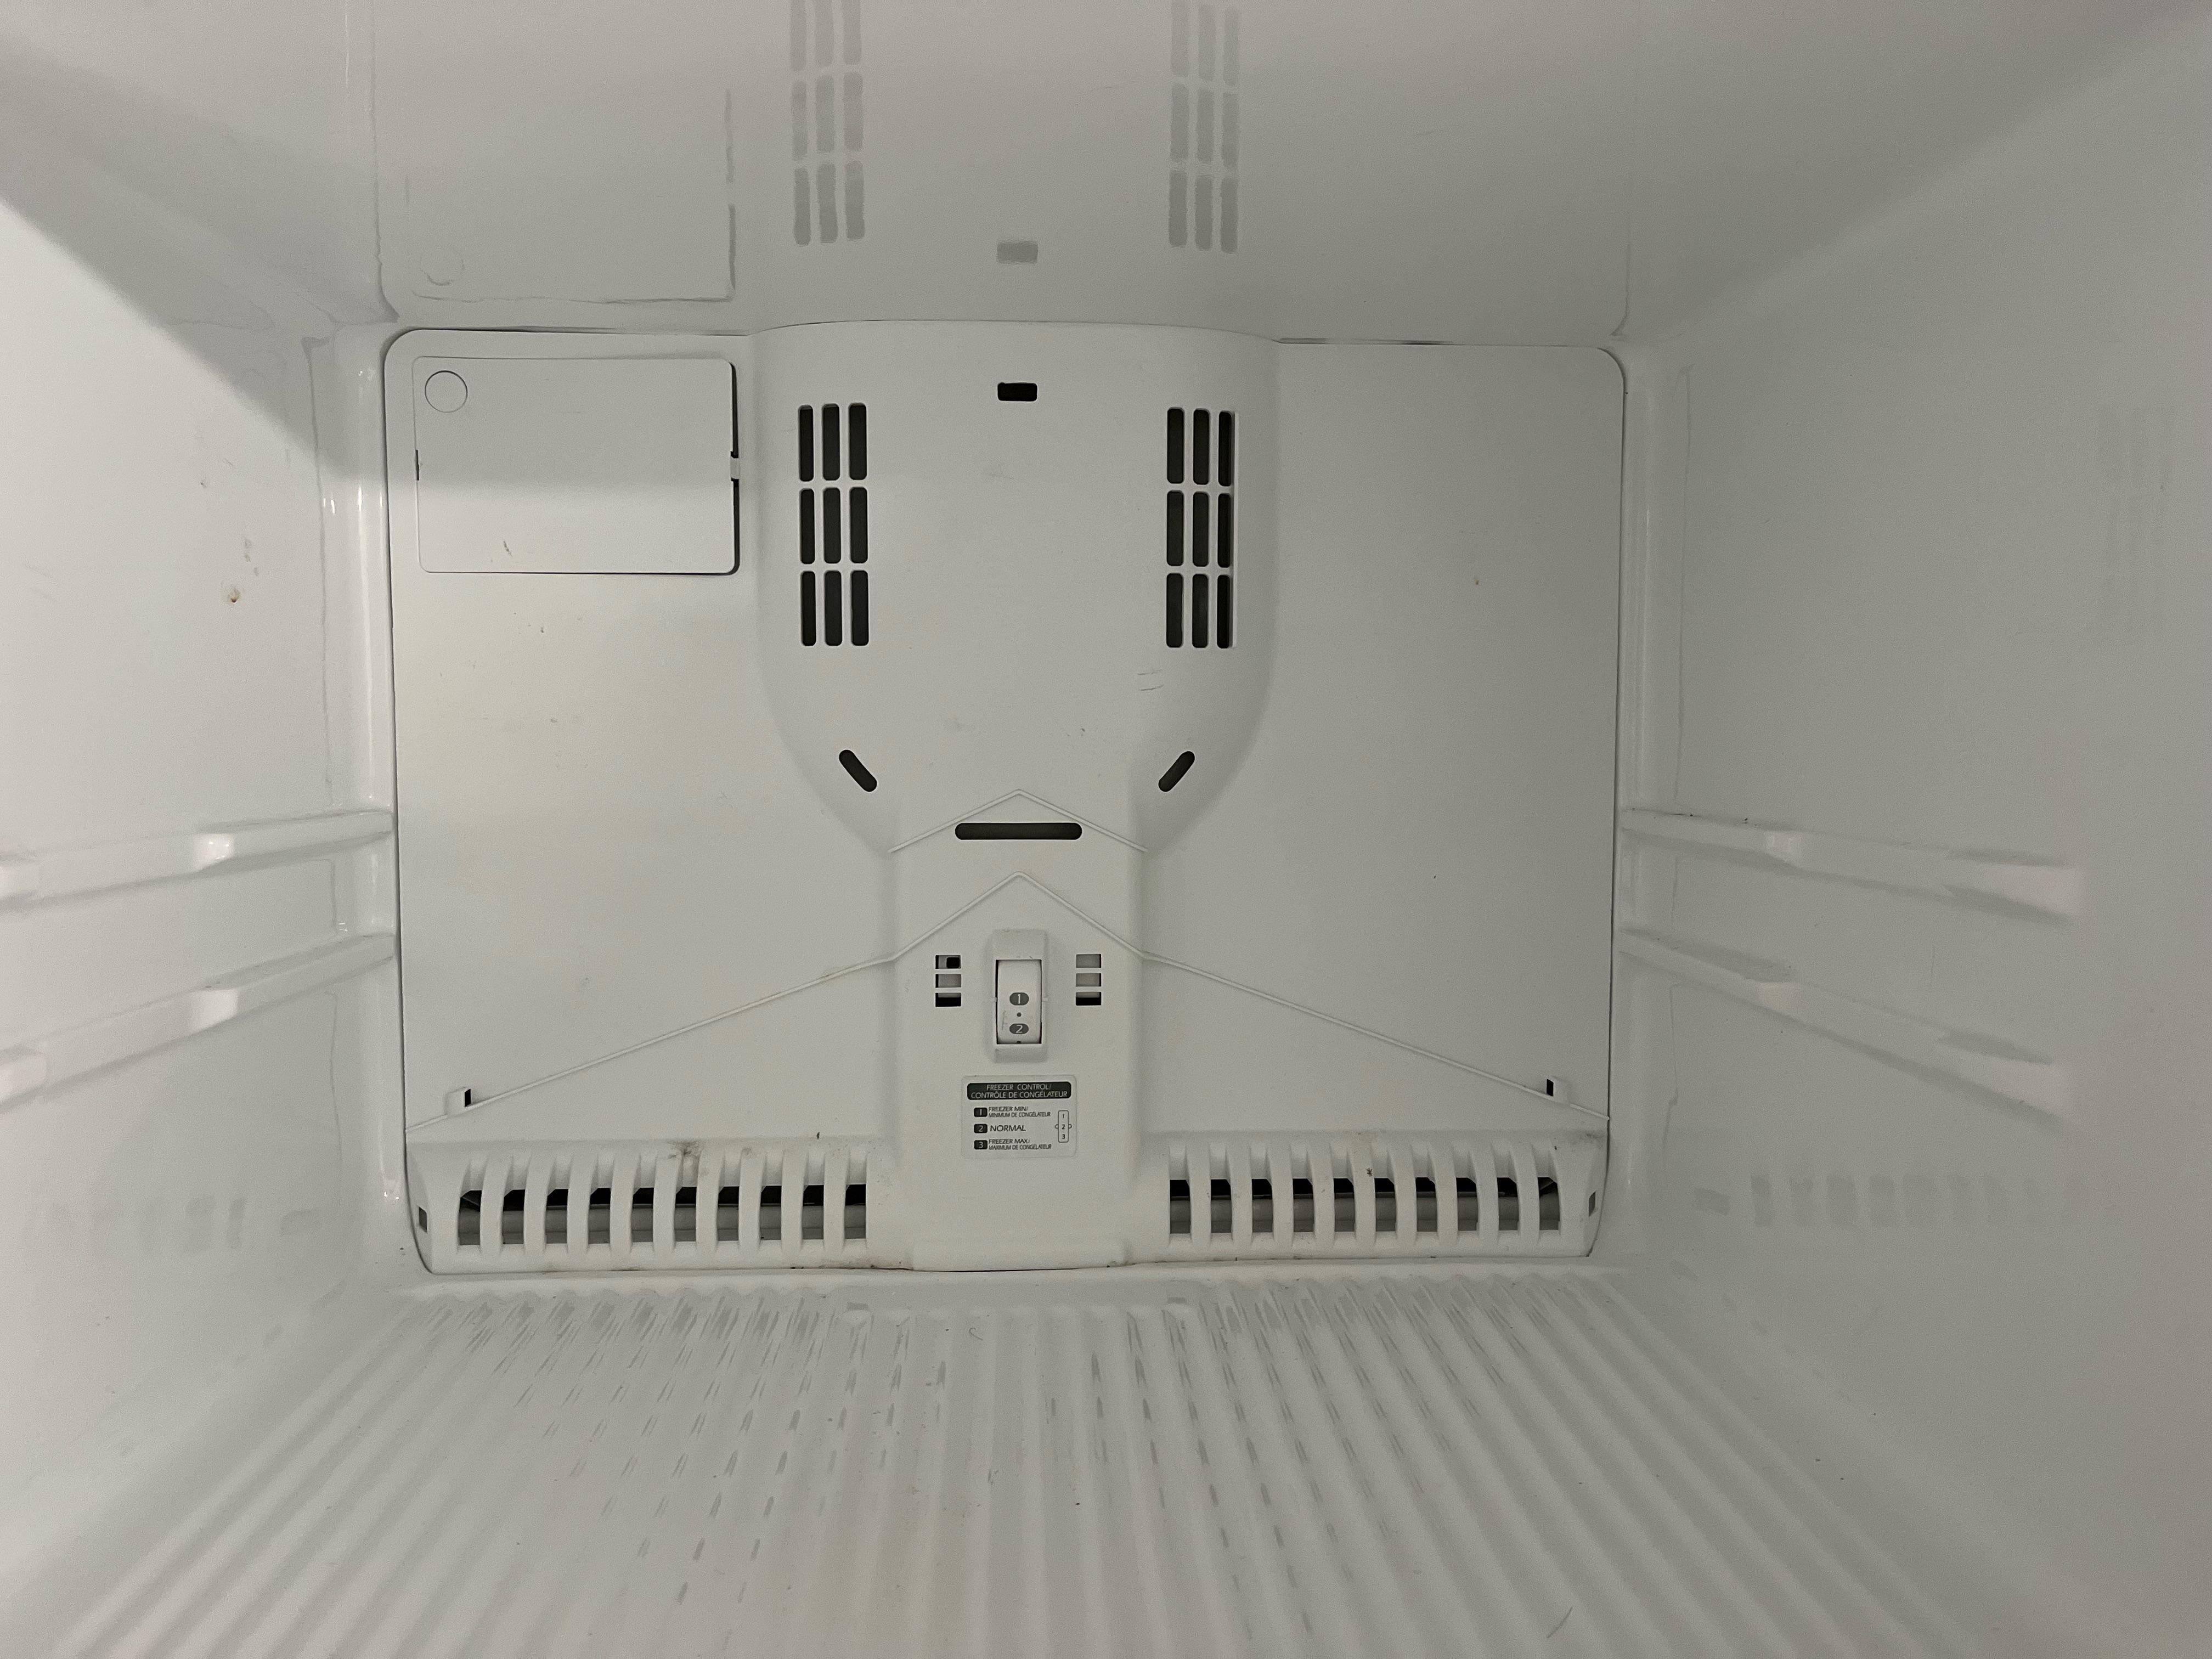
Goal: Find out whether your fridge is failing to move heat (condenser side), failing to move cold air (evaporator side), or failing to start the cooling system (controls or compressor start parts).
First: protect your food
Before you start pulling panels, do two quick things:
- Keep doors shut as much as possible. Every extra minute open dumps cold air.
- Move high-risk items first (meat, dairy, leftovers, and any temperature-sensitive meds) to a cooler with ice.
Food safety quick rule: The common USDA and FDA guidance is the “2-hour rule” for perishables above 40°F (less time if the room is very warm). A packed, unopened fridge can stay under 40°F longer than an empty one, so use a thermometer if you can. When in doubt, toss it. It hurts less than food poisoning.
Safety first and what to grab
You’ll be working around sharp sheet metal and electrical components. Unplug the fridge anytime you remove panels or touch wiring.
- Tools: Phillips screwdriver, 1/4-inch nut driver (common on fridge panels), flashlight, vacuum with crevice tool, coil brush, multimeter (helpful), small mirror.
- Supplies: Mild cleaner, towels, a cooler for food, and a couple of refrigerator thermometers if you have them.
Step 1: Confirm it’s actually not cooling
Don’t trust how it “feels” inside. A fridge can feel cool for a while even when it’s failing.
- Put a thermometer in a glass of water on the middle shelf. Check after about 60 minutes, then again at 2 hours for a truer reading.
- Target temps: 37°F to 40°F in the fridge, 0°F in the freezer.
- Listen: do you hear a fan, gentle hum, or is it totally quiet?
If the freezer is cold but the fridge is warm, you are often dealing with an airflow problem (damper or diffuser, evaporator fan, frost buildup, blocked vents, or an iced-up return path). If both are warm, focus on condenser coils, condenser fan, compressor start parts, controls, or sealed-system issues.
Step 2: Check the basics (doors, vents, settings)
Door gaskets and door alignment
If warm air is leaking in, the fridge runs hard and still loses. Look for gaps, torn gasket corners, or a door that doesn’t self-close.
- Do the “dollar bill test”: close the bill in the door. If it slides out with no resistance, the seal is suspect in that area.
- Clean gaskets with mild soap and water. Sticky grime can prevent a good seal.
Air vents blocked by food
Cold air needs a clear path. In many fridges, vents are along the back wall or upper corners.
- Pull items a couple inches away from the back wall.
- Make sure the return vent (often lower) is not blocked by bags or crammed drawers.
Temperature settings and modes
- Make sure it’s not in Showroom or Demo mode (common after a move).
- Turn off Vacation mode if enabled.
- If controls were bumped, set fridge to 37°F and freezer to 0°F, then give it 12 to 24 hours to stabilize after fixing the root cause.
Step 3: Clean the condenser coils
Condenser coils dump heat into your kitchen air. When they’re packed with dust and pet hair, the fridge can’t get rid of heat efficiently, so cooling suffers.
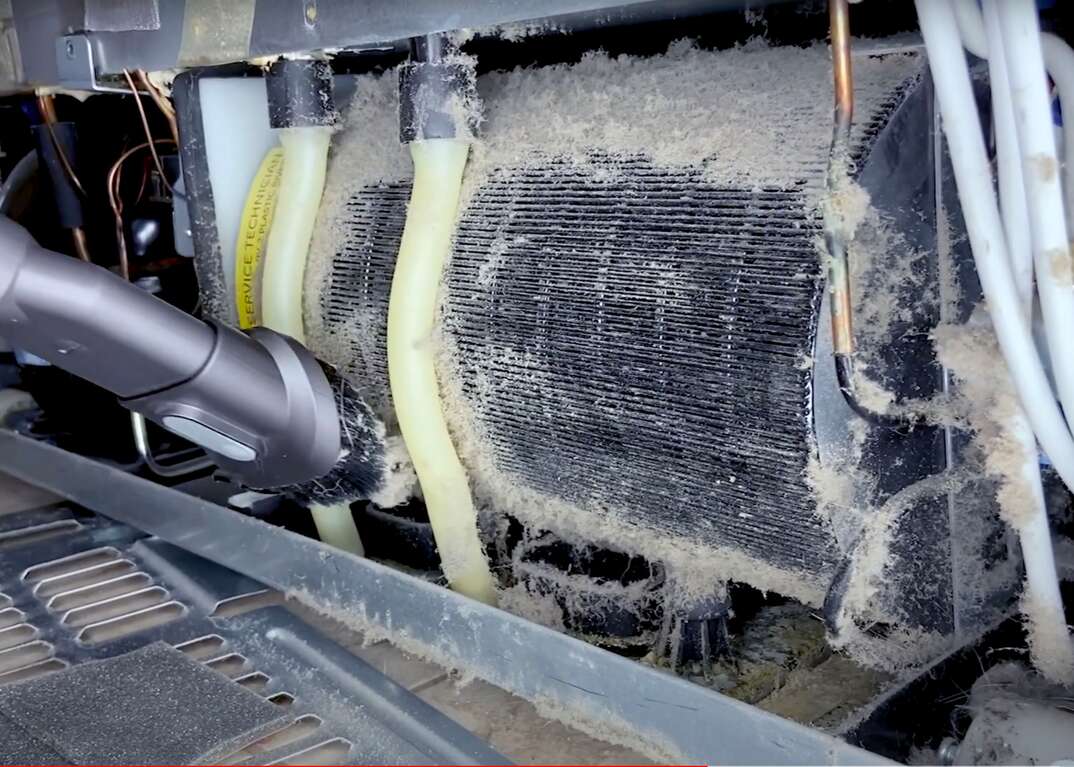
- Unplug the fridge.
- Find the coils: either under the front behind a toe kick grille or on the back.
- Vacuum loose dust first, then brush gently, then vacuum again.
- Clean the area around the compressor and the condenser fan intake (if present).
After cleaning: Plug it back in and listen. If the compressor starts and cooling improves over the next few hours, you likely found the problem.
Step 4: Check the condenser fan (if equipped)
Many fridges have a condenser fan near the compressor that pulls air across the coils. If it’s dead, the compressor overheats, pressures go wrong, and cooling suffers.
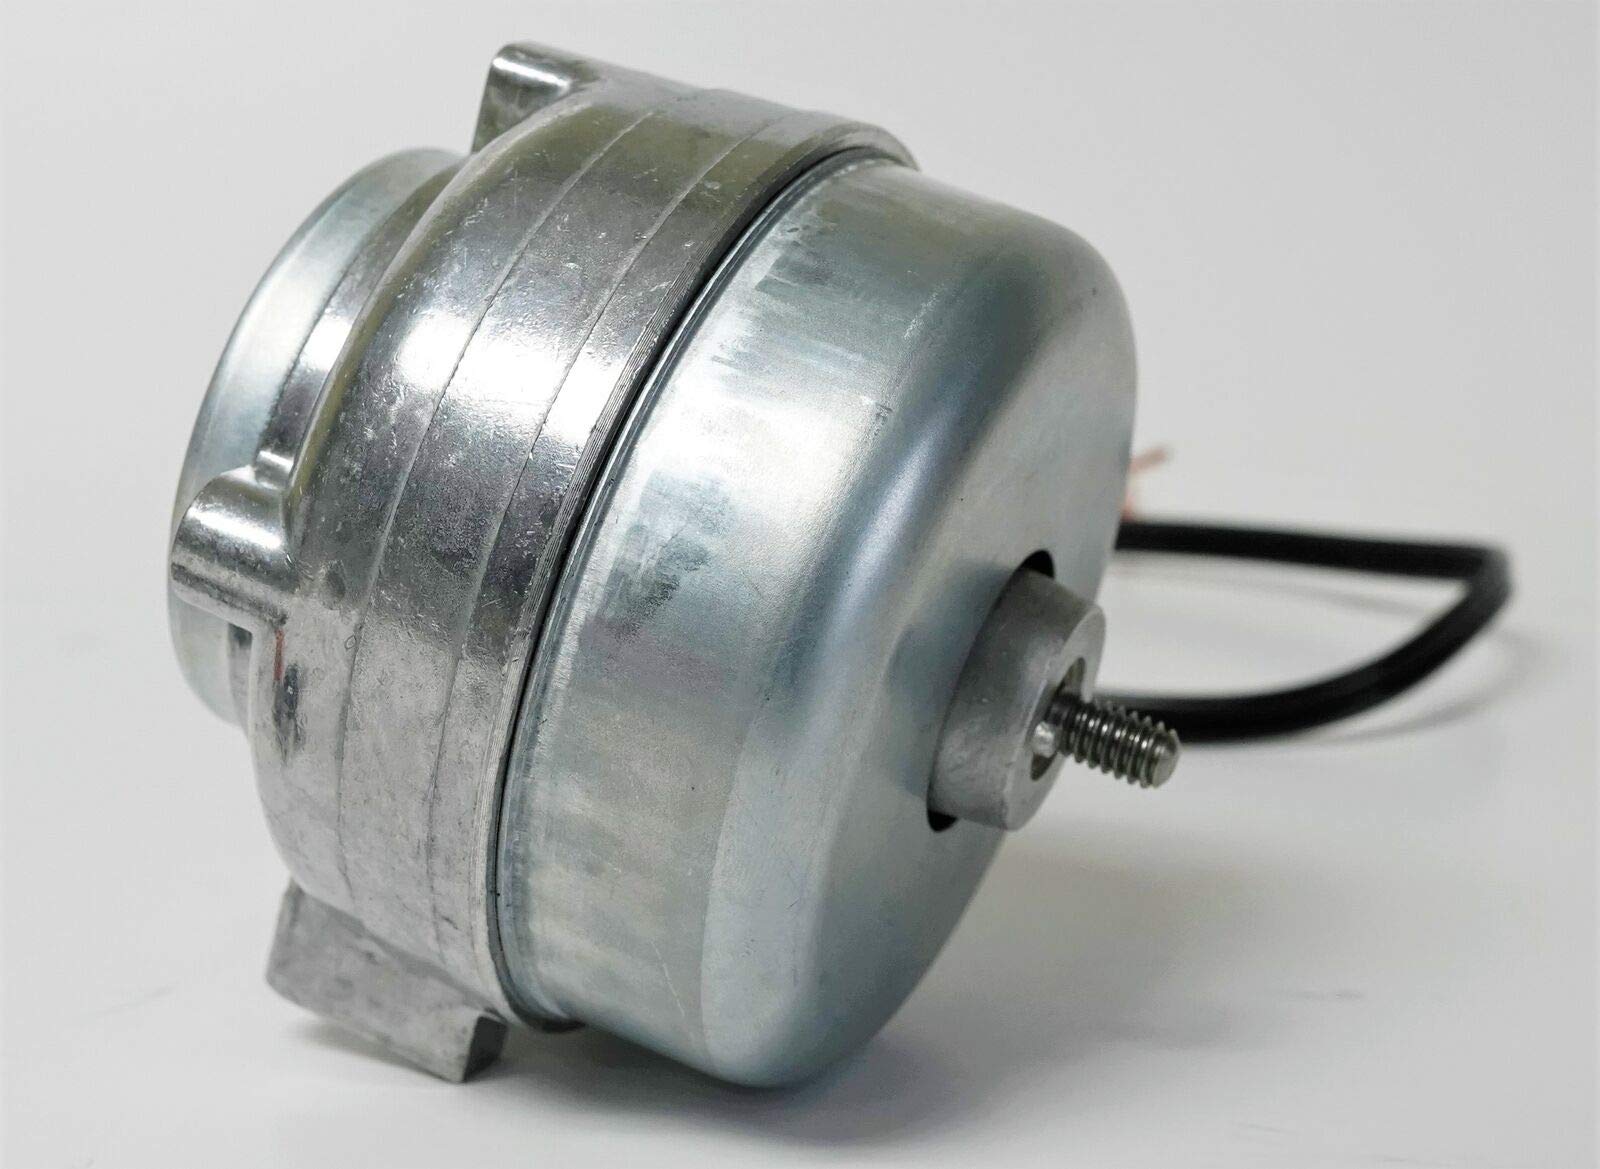
- Unplug the fridge and remove the lower rear access panel.
- Spin the fan blade by hand. It should turn freely.
- Plug the fridge back in briefly and observe with hands clear. Keep the panel off only as long as necessary and avoid any live terminals.
What to expect: On most fan-equipped models, the condenser fan typically runs when the compressor runs. Some models use variable-speed fans or different control strategies, so use this as a strong clue, not an absolute.
What the symptoms tell you:
- Fan blade jammed (debris, wiring, ice): clear obstruction. Replace blade if broken.
- Fan doesn’t run but spins freely: could be a bad fan motor, bad wiring, or a control board issue. A multimeter can confirm whether the motor is getting voltage.
- Fan runs but noisy or grinding: motor bearings failing. Replace the motor before it quits completely.
Step 5: Check the evaporator fan
The evaporator fan is inside the freezer (usually behind a rear panel). It’s the fan that pushes cold air through the freezer and over to the fridge compartment.
Classic sign: The freezer is kind of cold near the back, but the fridge is warm, and you don’t hear the normal fan sound when the door is closed.
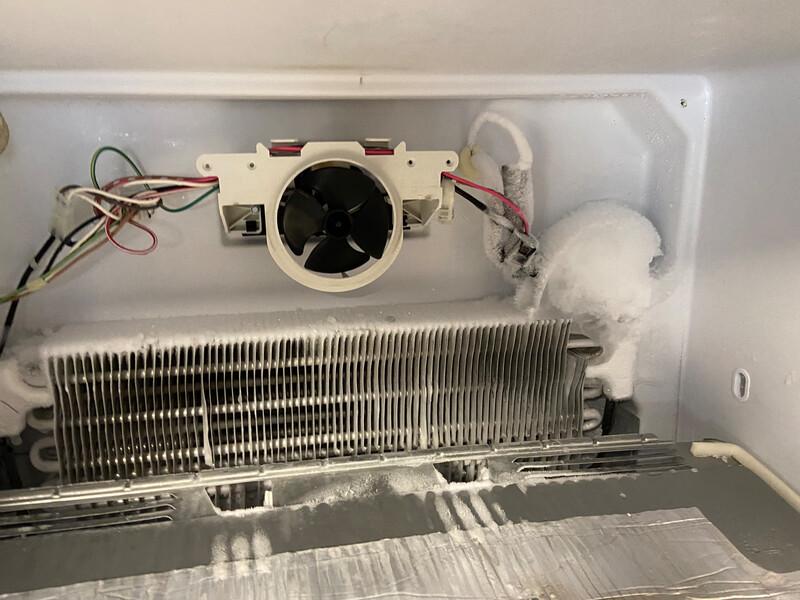
- Open the freezer and listen for the fan. Many units stop the fan when the door opens, so press and hold the door switch to simulate a closed door. Some models have more than one door switch.
- If the fan never runs, unplug the fridge and remove the freezer’s rear interior panel to inspect.
- Look for ice buildup hitting the fan blade, broken blades, or loose connectors.
If the evaporator fan is not running: cooling performance tanks. Replace the fan motor if it’s getting power but won’t spin, or if it’s seized and won’t turn freely by hand (with power unplugged).
Step 6: Check the damper or diffuser
Most refrigerators control how much freezer air enters the fridge compartment using an air damper (also called a diffuser). If it sticks closed, the freezer can look fine while the fridge warms up.
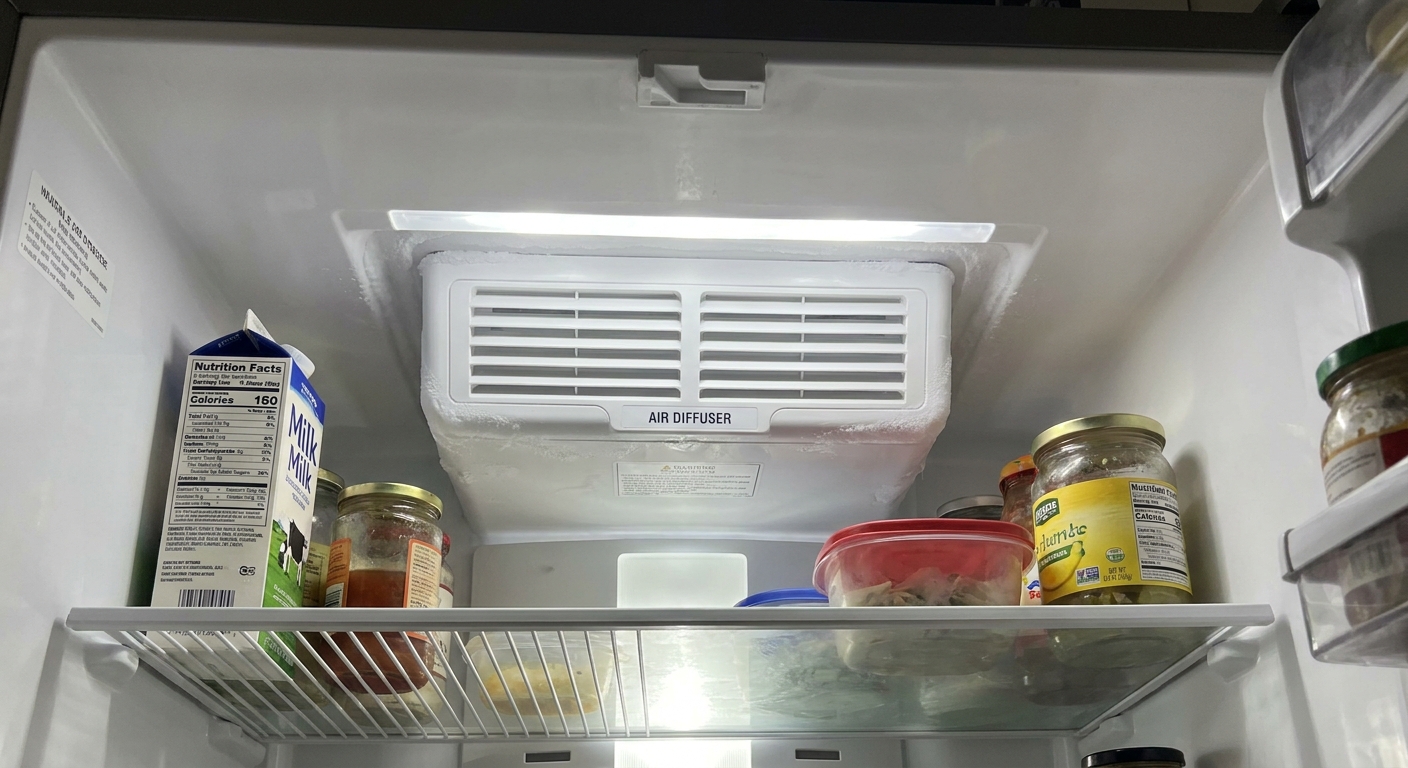
- Find the air inlet vent in the fridge section, often near the upper back wall or upper left.
- With the fridge set colder, you should often feel some airflow at that vent after the unit has been running a bit.
- If your model uses a mechanical damper, you may see a flap that should open and close. If it is visibly stuck shut or packed with frost, that is a strong lead.
- If it is an electronic damper, you might hear a small motor move it when settings change. No movement does not guarantee failure, but it is a clue.
If the freezer is cold, the evaporator fan runs, vents are not blocked, and the fridge is still warm, a stuck or failed damper climbs the suspect list fast. Less commonly, a thermistor or control issue can command the damper closed even when the fridge is warm.
Step 7: Check for frost buildup (defrost trouble)
Behind the freezer rear panel sits the evaporator coil. It should have a light, even frost pattern. If it’s buried in snow and ice, air cannot pass through, so the fridge side warms up first.
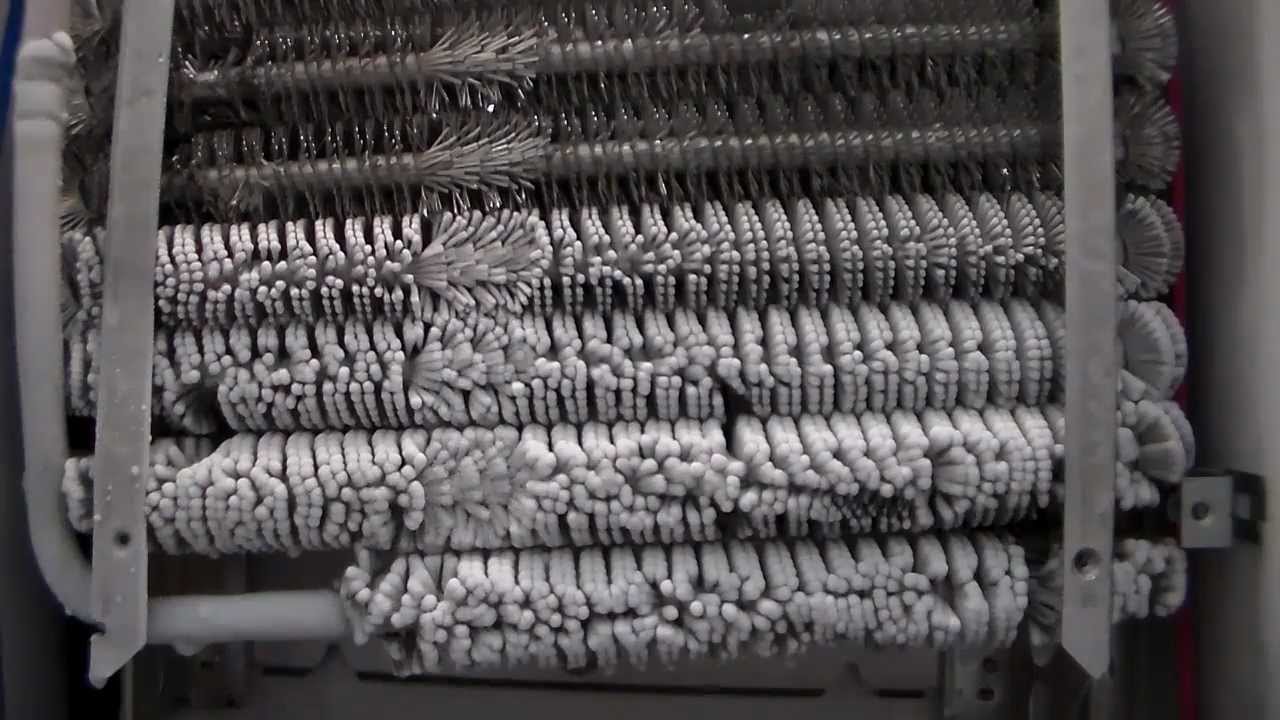
What you might see:
- Heavy solid ice blanket: likely a defrost system failure (defrost heater, defrost thermostat, defrost sensor, or control board depending on model).
- An ice sheet at the bottom of the freezer or ice that seems to creep outward from the floor: often points to a clogged defrost drain that froze over and started blocking airflow. Clearing the drain and the ice can restore airflow, but you still need to figure out why it froze (partial clog, door leak, or defrost issue).
- Only a small frosty patch on part of the coil with the rest mostly bare: a classic sealed-system clue (low refrigerant, restriction, weak compressor), but confirm fans, damper operation, and airflow first. Coil designs vary, and weird frost patterns can sometimes be airflow-related.
Quick temporary recovery (not a repair)
If food is at risk and the coil is iced up, a full manual defrost can buy you time:
- Unplug the fridge.
- Move food to a cooler.
- Leave doors open 12 to 24 hours with towels down.
- A small fan blowing into the freezer can speed melting.
- Avoid heat guns. If you use a hair dryer at all, keep it on low, keep it moving, and keep it away from plastic liners and wiring.
- Do not chip ice with tools. You can puncture a coil and turn a bad day into an appliance obituary.
If it cools great for a few days and then warms again, you almost certainly have a defrost system problem that needs diagnosis and parts.
Step 8: Verify the thermostat or sensor
Depending on your fridge, you’ll have either a mechanical cold control thermostat (older models) or electronic thermistors (most modern models). Either way, the job is the same: tell the fridge when to run.
Mechanical thermostat checks
- Turn the temperature dial from warm to colder and listen for a click (not always audible, but often is).
- If the fridge never cycles on unless you jiggle the dial, the thermostat may be failing.
Electronic sensor checks
Bad thermistors can misread temperature and prevent proper run times. Testing varies by brand, but typically involves measuring resistance at a known temperature and comparing to the service sheet.
- Look for a tech sheet behind the toe kick, in the control console, or taped to the back panel.
- If you’re comfortable with a multimeter, follow the resistance chart on the sheet.
My practical advice: If you don’t have the tech sheet and you’re guessing at thermistor values, pause and look up your model’s service info first. Thermistors are cheap, but parts-cannon troubleshooting gets expensive fast.
Step 9: Start relay and compressor checks
If both the freezer and fridge are warm, and coils are clean, fans work, and the unit still won’t cool, the next common suspect is the compressor start components.
What to listen for
- Click… hum… click every few minutes: often a bad start relay or overload, or a compressor that is struggling.
- Compressor is hot to the touch (careful): could be struggling to start or running inefficiently.
Basic start relay inspection
Unplug the fridge, remove the rear lower panel, and locate the compressor. The start relay assembly plugs onto the compressor pins.
- Remove the relay. If it rattles like a baby toy, that often indicates a failed relay, but it is not a guarantee.
- Look for scorch marks or melted plastic.
Replacing a start relay can be a reasonable DIY repair on many models, but use the correct part by model number. If a new relay doesn’t solve it, you may be facing a compressor or sealed-system issue.
When the compressor runs but nothing cools
If the compressor runs a lot, the condenser area is very warm, and the evaporator coil is barely getting cold or shows an odd frost pattern, a sealed-system problem becomes more likely. At that point, it is usually a pro diagnosis decision.
Quick symptom checker
| Symptom | Most likely cause | Best next check |
|---|---|---|
| Freezer cold, fridge warm | Airflow issue | Evaporator fan, damper or diffuser, frost buildup, blocked vents, iced return path |
| Both warm, fridge running constantly | Poor heat rejection | Clean condenser coils, verify condenser fan (if equipped), check for blocked airflow around fridge |
| Both warm, clicking every few minutes | Start relay or overload, or compressor | Inspect and test start relay; consider pro if persists |
| Freezer panel iced solid | Defrost failure | Manual defrost to confirm, then test defrost heater, sensor, thermostat, or control |
| No fan sound, lights work | Fan motor, door switch, or control issue | Test door switch, check evaporator fan operation |
When to call a pro
I’m all for DIY, but there’s a point where it makes sense to stop.
- Sealed system signs: tiny frost patch on evaporator (after confirming airflow and fans), oily residue near tubing, compressor running but not cooling.
- Refrigerant work: opening the sealed system and handling refrigerant requires specialized tools and, in the US, EPA Section 608 certification.
- Control board diagnosis when voltage tests get complicated and the tech sheet is missing.
If your fridge is older and the repair quote is high, it may be time to price out replacement, especially if the compressor is the culprit.
FAQ
How long should a fridge take to start cooling again after a fix?
You’ll usually feel improvement in a few hours, but expect 12 to 24 hours to stabilize to safe temps after the underlying issue is corrected.
Is it normal for the freezer to be cold but the fridge warm?
It’s common. The fridge section typically borrows cold air from the freezer, so a failed evaporator fan, iced evaporator, stuck air damper, or blocked return vent can leave the freezer cold while the fridge warms.
Can dirty coils really stop cooling completely?
Dirty coils can cause a major loss of cooling, long run times, and intermittent warming, especially with pets or high room temperatures. Sometimes it gets bad enough that it looks like the fridge “stopped,” even though the compressor is still trying.
What if my fridge has coils in the walls and I can’t find them?
Some models use hidden condensers. In that case, focus on making sure ventilation around the fridge is clear, the condenser fan (if equipped) runs, and the evaporator side is moving air properly.
Wrap-up
If you take nothing else from this guide, remember the order: airflow and settings first, then coils and condenser fan, then evaporator fan, damper, and frost, and only then start poking at controls and compressor start parts. That sequence fixes the most fridges with the least headache.
If you want to go one step further, grab your model number from the inside wall and look up the parts diagram and service sheet. The fridge stops being mysterious the moment you can name what you are looking at.