If your single- or double-hung window won’t stay open, you’re not dealing with “old house vibes” or bad luck. You’re dealing with a counterbalance system that’s worn out, broken, or disconnected. The good news is that this is one of those repairs that looks mysterious until you see the parts, then it turns into a straightforward swap.
In this guide, I’ll walk you through diagnosing what type of balance your window uses, how to safely remove the sash, and how to replace the most common culprits: spiral balances, block-and-tackle (channel) balances, and old-school sash cords with weights. I’ll also call out coil balances, since they’re common too and easy to misidentify.
Before you start: safety and a quick reality check
A hung window that won’t stay open can drop fast. That can pinch fingers, shatter glass, or smack you right in the pride. Do these things first:
- Remove blinds and curtains so you can see the jambs clearly.
- Support the sash while inspecting. A scrap of wood in the track works, or have someone hold it.
- Take a few photos of each side track and any hardware before you pull anything apart. Future you will be grateful.
Lead paint note: If you’re working on older wood windows in a pre-1978 home, assume paint may contain lead. Avoid dry sanding, score paint lines carefully, and keep dust controlled.
When to stop and call a pro: If the glass is cracked, the frame is badly rotted, the sash is binding so hard you have to force it, or you have very large or heavy sashes (some older wood windows), professional help may be the safer move.
Why hung windows won’t stay open
Hung windows are supposed to feel “light” as you lift them because a balance system inside the side jamb is helping you. When that system fails, gravity wins.
- Broken or weak sash balances (common in vinyl and many newer wood windows).
- Disconnected sash cord (common in older wood windows with weights in the pockets).
- Wrong replacement balances (someone replaced them before, but used the wrong strength).
- Excess friction or binding (paint, swollen wood, bent track). This usually makes the sash hard to move, not just unable to stay up, but it can contribute.
Identify your balance type
Open the window a few inches and look along the side jambs (the vertical tracks). You’re looking for clues.
1) Spiral balances
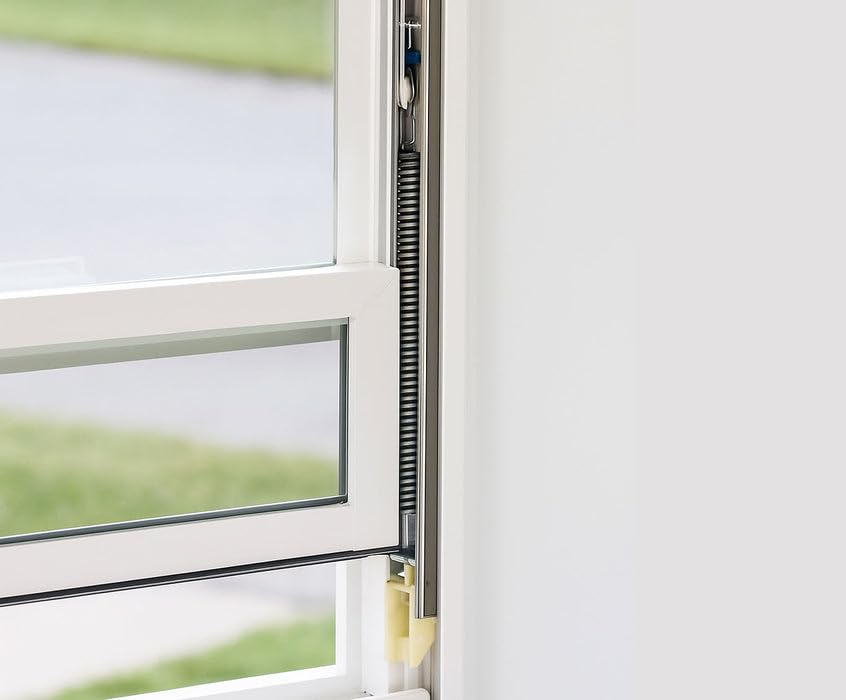
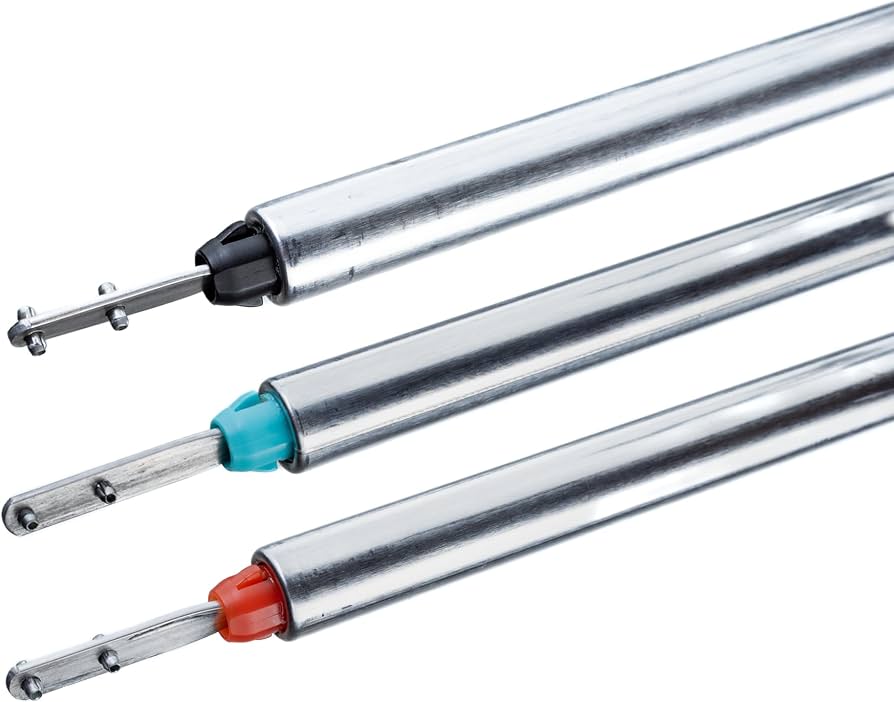
You’ll usually see a round metal or plastic tube on each side. The sash pivot pins engage a shoe or attachment in the side track that’s connected to the spiral mechanism.
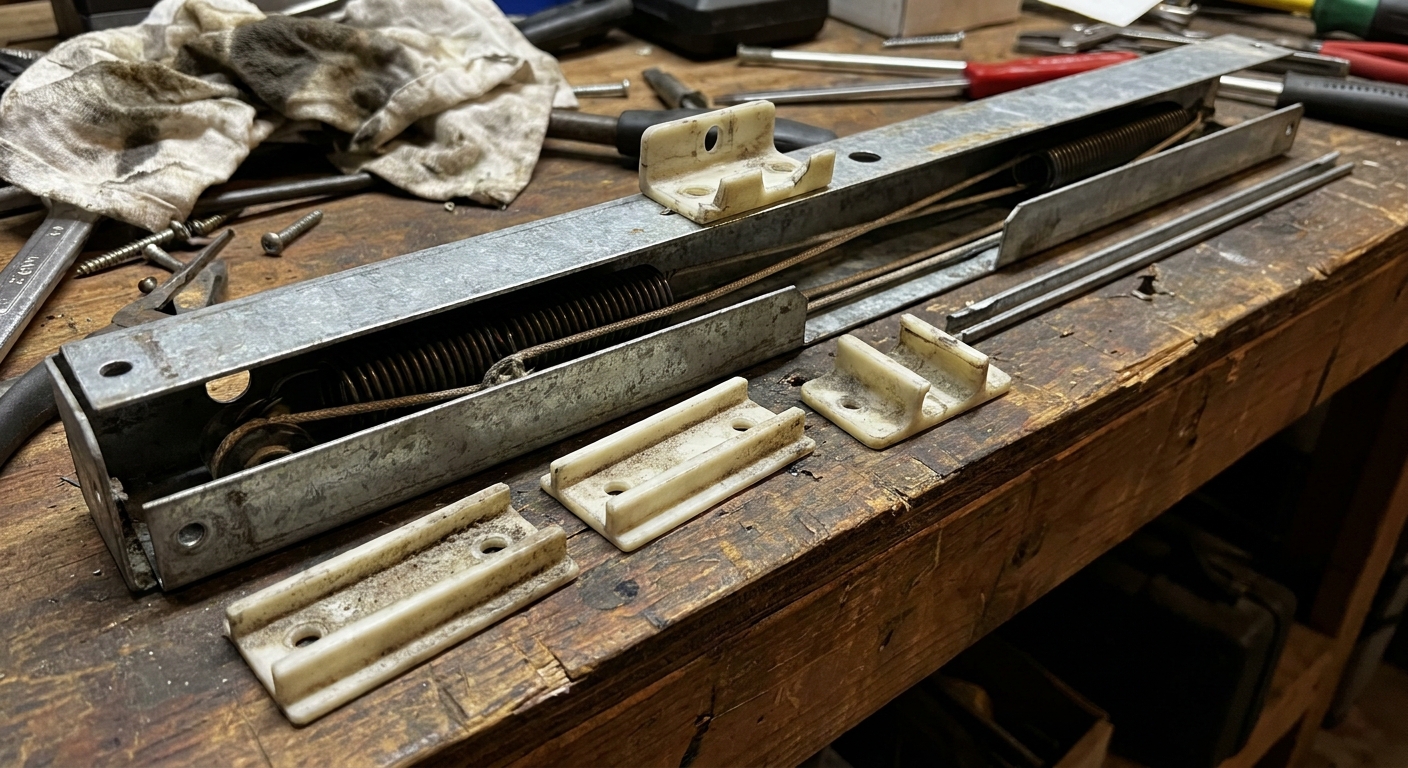
2) Block-and-tackle or channel balances
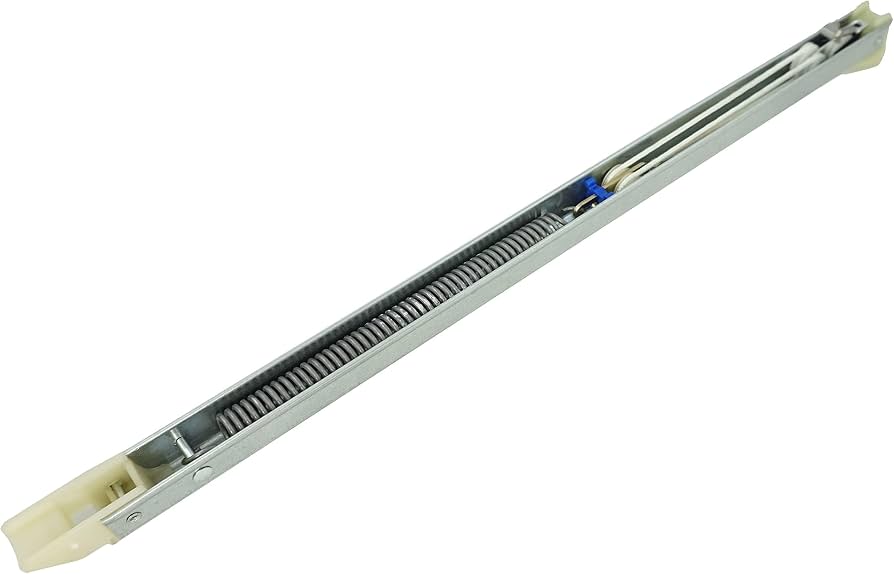
These are metal channels with a spring mechanism inside. You may see them when the sash is tilted in, or you might only see the plastic shoe down in the track.
3) Coil balances
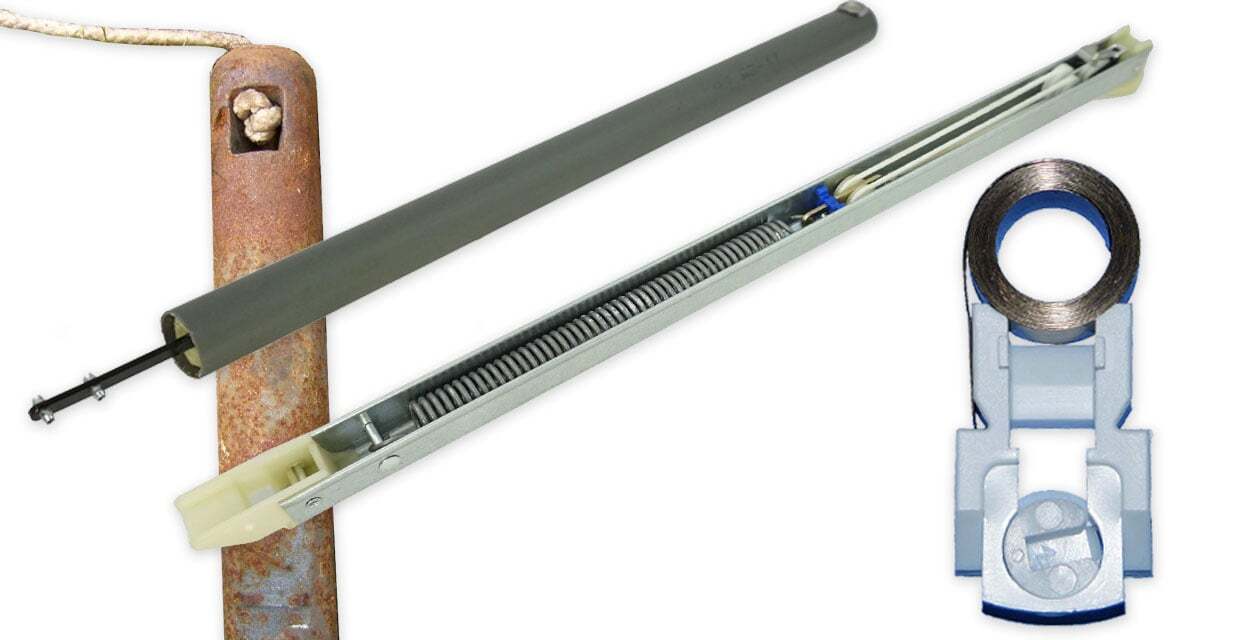
If you see a flat, coiled spring in a small plastic housing (often near the lower part of the jamb), you’re looking at a coil balance system. They’re common on many vinyl tilt windows. The fix is still a parts swap, but the parts and removal method are different than channel or spiral balances, so identify it correctly before ordering.
4) Sash cords and weights
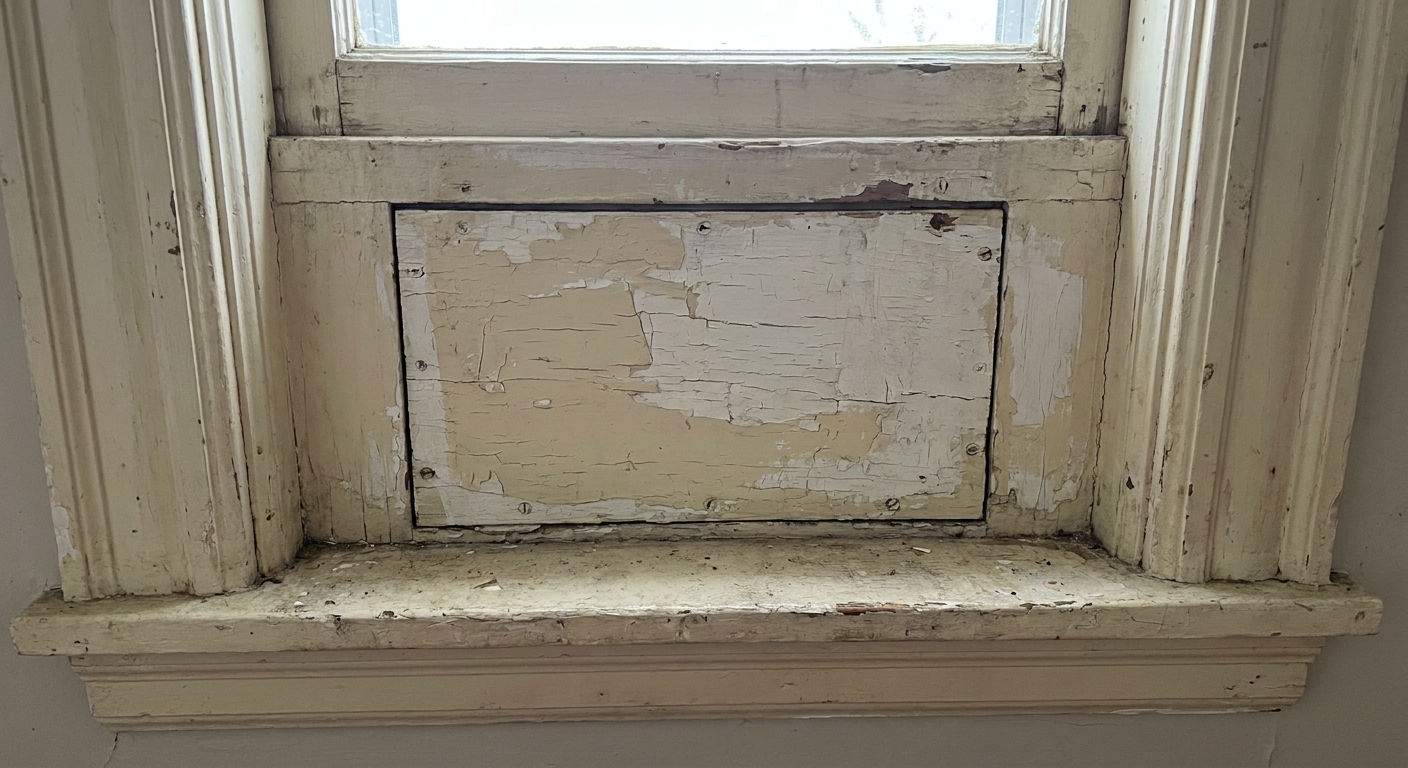
These windows often do not tilt in. You may see a thin cord near the top corners of the sash, and there are usually wood access doors in the side jambs (weight pockets).
Tools and supplies
You won’t need much, but having the right items makes this job go from “fight” to “fix.”
- Flathead screwdriver
- Phillips screwdriver
- Putty knife (handy for painted stops and tight parts)
- Pliers (for gripping, not as your first choice for tensioning)
- Utility knife
- Tape measure
- Marker or painter’s tape for labeling left and right parts
- Replacement balances or sash cord kit (details below)
- Safety glasses and gloves
- Spiral balance tensioning tool (if you have spiral balances)
Step 1: Check the simple problems
Before you order parts, do these quick checks.
Make sure the sash is engaged
On tilt-in windows, a sash pivot pin can pop out of the balance shoe. If one side is disconnected, the sash will drop or twist.
- Tilt the sash in.
- Look at the bottom corners for the pivot pins.
- Make sure each pin is seated in its shoe.
Look for broken plastic in the track
If you find plastic bits, the balance shoe may have cracked, or a guide may have snapped. That almost always means replacing the balance(s), not just “tightening something.”
Check for binding
If the sash is hard to lift and also won’t stay up, friction could be part of it. Paint buildup on wood windows and dirty tracks on vinyl windows are common.
- Clean tracks with a vacuum and damp rag.
- For vinyl, a light dry lubricant can help (avoid oily sprays that attract dirt).
- For painted wood, score paint lines with a utility knife before forcing anything.
Step 2: Remove the sash (tilt-in windows)
Most modern single- and double-hung windows are tilt-in, which makes balance replacement much easier.
- Unlock the window.
- Raise the lower sash about 3 to 6 inches (or as needed to clear the frame and tilt comfortably).
- Release the tilt latches at the top of the sash and pull the top toward you.
- Support the sash and rotate one bottom corner up to free one pivot pin, then free the other.
- Set the sash somewhere safe (flat on a blanket is best).
If you’re working on the upper sash too, many windows let you tilt it in after lowering it and flipping a pair of release clips in the jamb. If yours doesn’t obviously do that, don’t force it. Some designs require manufacturer-specific steps.
Fix 1: Replace spiral balances
Spiral balances are those round tubes with a spring-loaded rod. They lose tension over time, or the attachment point breaks.
How to confirm spiral balances are the issue
- The window lifts easily at first, then drops.
- You see spiral tubes on both sides.
- The spiral rod looks bent, or the sash corner attachment hardware is broken.
How to order the right spiral balance
- Tube length: Measure the metal tube length, not including plastic end pieces. If you cannot measure it accurately in place, remove the balance to measure it.
- Tube diameter: Common sizes are 3/8 inch and 5/8 inch.
- Tip and attachment style: Match the end shape and how it mounts.
- Markings: Some brands also use color codes or weight ratings. Match any markings you see.
Remove and replace
- Remove the spiral balance by taking out the screws holding the tube to the jamb.
- Transfer or replace the sash attachment if your setup uses a specific clip, shoe, or pivot style.
- Install the new tube in the same position.
- Set spring tension using the proper spiral balance tensioning tool whenever possible. Pliers can slip and chew up the rod, so use them only if your specific balance style allows it and you can keep a solid grip.
- Reinstall the sash and test. If the sash creeps down, add a bit more tension on both sides equally.
Tip from a guy who has learned the hard way: Add tension in small increments. Over-tension can make the window shoot up like it’s late for work.
Fix 2: Replace block-and-tackle (channel) balances
Channel balances are one of the most common modern balance types, and failures are common. If your window slams shut, one or both balances are usually broken, disconnected, or the wrong strength.
How to confirm channel balances are the issue
- You see a metal channel in the jamb or attached to the sash.
- The plastic shoe in the track looks cracked or sits crooked.
- The sash won’t stay up, even though it slides smoothly.
How to order the right channel balance
There are a few matching details that matter:
- Length of the metal channel (measure end to end).
- Stamp code (often printed on the metal channel and tied to spring strength).
- End fittings (the plastic pieces on the ends vary by shape and hook style).
- Attachment style (some hook into the shoe, some screw in, some clip in).
If you can, remove one balance and use it as your reference. Matching by a clear photo of the full balance, including the stamp and both ends, is often more reliable than guessing.
Replace the balances (general method)
Window designs vary, but the workflow is usually the same.
- Remove the sash (see earlier section).
- Locate the balances in the side jambs.
- Release the balance from the shoe or remove the screws that hold the channel to the jamb.
- Control the shoe if it’s under tension. Some shoes can snap upward with force. Many designs allow you to “lock” the shoe in place (for example, by rotating the cam or using a small nail or flat screwdriver through a locking hole). If you’re not sure, check the instructions from your window manufacturer or balance supplier for your exact shoe style.
- Install the new balance in the same orientation.
- Reset the shoes to the proper height (often near the sill) so you can reinstall the sash pivots evenly.
- Reinstall the sash, tilt it back in, and test for smooth travel and holding power.
Best practice: Replace balances in pairs on the same sash, even if only one is obviously broken. If one side is new and the other is tired, the window will feel crooked and wear parts faster.
Fix 3: Repair sash cords and weights
If you have an older wood double-hung window with weights, the window won’t stay open when a cord snaps or pulls off the weight. You might even hear a weight thud inside the pocket.
What you’ll need
- Sash cord (cotton sash cord or a modern sash chain can work)
- New knots or sash cord fasteners
- Small nails or screws (depending on sash design)
Replace a broken sash cord
- Remove interior stops carefully (score paint lines with a utility knife first). Label pieces so they go back in the same spot.
- Remove the lower sash by pulling it inward once the stops are off.
- Open the weight pocket access door on the side jamb.
- Retrieve the weight and remove the old cord.
- Cut new cord long enough to run from the sash, over the pulley, down to the weight, plus extra for knots.
- Thread the cord over the pulley and tie it to the weight with a secure knot.
- Reattach the cord to the sash (many sashes have a side groove and a knot pocket).
- Test the movement before reinstalling the stops.
Quick check: With the sash reinstalled, it should stay in place at different heights without drifting up or crashing down. If it drifts, the weights might be mismatched or missing.
What if it’s single-hung?
Single-hung windows usually have a fixed upper sash and an operable lower sash. The repair is the same idea, just fewer moving parts.
- If the lower sash won’t stay up, you’re replacing balances on the lower sash only.
- If the window is an older single-hung wood unit with weights, it may still have cords and weights for the lower sash.
Troubleshooting after replacement
The sash still won’t stay up
- You likely installed the wrong strength balance, or only replaced one side.
- On spiral balances, you may need more tension (both sides equally).
The sash shoots up or is hard to pull down
- Balance strength is too high, or spiral tension is too tight.
The sash is crooked or binds
- One balance may be mounted higher than the other.
- A pivot pin may not be seated correctly in the shoe.
- Tracks may be dirty, or a guide clip may be missing.
You can’t tilt the sash back in
- The balance shoes may not be set to the same height.
- Some shoes must be rotated to an “open” position to accept the pivot pin.
Keep balances alive longer
- Do not slam the sash up or down. Let the balances do their job.
- Keep tracks clean, especially on vinyl windows where grit acts like sandpaper.
- Lock the window when closed. A slightly open, rattling sash wears parts faster.
- Replace in pairs so one tired balance does not overload the other.
FAQ
Do I have to replace both sash balances?
I recommend it. If one failed, the other is usually not far behind, and uneven lift can twist the sash and chew up the new part.
Can I lubricate something to make the window stay open?
Lubrication can help a sticky window slide better, but it will not fix a window that drops. Dropping is a balance problem, not a friction problem.
How long does it take to replace balances?
Once you have the correct parts, most homeowners can replace balances on a tilt-in window in 30 to 60 minutes.
How do I find the right balance without a brand name?
Remove one balance and match by length, end fittings, and any stamp code or markings. A clear photo of the full balance and both ends is often enough for a supplier to identify the right replacement.
My final check
When you’re done, run the sash up and down a few times and stop it at three points: about 6 inches up, halfway, and near the top. If it holds at all three without creeping, you nailed it. If it creeps, don’t fight it with brute force. Recheck balance match, shoe position, and whether both sides are doing equal work.
That quiet moment when the window stays exactly where you left it is the kind of small victory that makes DIY worth it.